Showing posts with label My Mind's Eye. Show all posts

Friday, June 15, 2012

Tangerine Tango

It's the Pantone color of the year for 2012. Tangerine Tango is bold and energetic. It was a part of my first assignment at Get it Scrapped. Along with my fellow creative team members, we shared a variety of pages in various hues of orange. To get the most of this vivacious color, check out the article over at Get It scrapped.

Supplies: cardstock: Colorbok; patterned paper: Echo Park and Basic Grey; mist: Maya Road; buttons: My Mind's Eye; other: Pencil, stencil, canvas, Kraft paper accents

I often choose orange when I scrap pool photos. The turquoise water pairs naturally with the orange to form a complementary color scheme.Since this color combo was already so energetic, I chose orange and neutral embellishments.

Friday, May 11, 2012

LOAD 512 progress report and NSD

 Day 11. I am still hanging in there though I have no idea how. People often ask me how I can even think about making a page a day. I really attribute it to time management and a good creative habit. LOAD pages are not always my most detailed pages. The idea is to get the story captured, after all. Sometimes on weekends, I do manage a more detailed page.
 As far as NSD, well, I just did not get a whole lot of time to do the challenges. I made two pages. So not bad, but nowhere near what I was expecting to do. I had no internet on Saturday and a Power Outtage on Sunday. So I had no clue as to what the challenges were. Regardless, at the end of the day, pages were made.
  So I guess now you are wondering exactly what these pages look like....
Die cuts: scenic route, Alphas: Pink Paislee, Echo park and Sizzix
Flock: Hampton Arts; Buttons: Basic Grey
Jewels: Making memories and Prima; arrow: Sizzix
badge: Making memories; ink: SEI and Ranger
stamp: bubble wrap; Mist: Tattered angels and homemade
I made Fluffed and Dangerous for today's LOAD challenge. The idea was to use the sense of touch as inspiration. So I chose to add flocking to the word Fluffed. I also chose spiky elements to add to the theme of dangerous.
Cardstock: Colorbok; Patterned Paper: Basic grey and WE R Memory keepers
Ribbon: Making memories; Alphas: Sassafrass
other: Brads
Getting to know you was a page for LOAD. We were given a sketch and told to alter it.
Cardstock: Colorbok; Patterned paper: Crate paper and American crafts
Flowers: Prima; Brads: making memories
Rub ons: Maya road; Chipboard: Sassafrass
Alphas: Basic grey; Badge: October Afternoon

This was a LOAD page inspired by sound. Around 3 pm we always here our kitten reminding us to feed her.
Cardstock: Colorbok; Patterned paper: My Mind's eye
buttons: Basic grey, twine: twinery
alphas: Paper trunk, Other: Brads, button

This was an NSD page for Big Picture Classes. I love how I made this with a 6x6 paper pad.

I'll have more to share later. I'm off ot create just a little bit more. It's good therapy.

Monday, February 13, 2012

Project Life, January 2012

  Since the theme this month at Scrap Our Stash is all about taking a leap( and this is a Leap Year), I thought I would share something that I just ventured into. I never thought I would try Project Life. It seemed like a daunting task to add it to my long list of photos that I want to scrap. During the past month, I have been reading various designer blogs and admiring all of the neat little pockets and pages filled with  journal cards,photos, mementos and memories. I finally decided to take the leap and try out Project Life sometime in mid-January. I am not using it in place of my scrapbook pages, but rather, as a way to introduce and supplement each month. So the plan is to make the PL pages for each month, then later on, print out the best photos for the month so I can scrapbook those stories in more detail.
  So now that I had decided to begin project life, I was faced with the decision of what products I would use. Buying a project life kit was not an option for my budget. I can see how it would have made things a whole lot easier for me, but well...maybe next year. I was happy to find that I had a whole set of  those divided page protectors in one of my albums. I had always struggled to use them with my regular pages. So now, I am happy they will get some use. I decided that, for the cards, I would cut my own from my stash. Each month, I will make a kit from my stash of supplies. It might take me a little more time than reaching for an item from a pre-made kit, but it will sure be fun.

papers- My Mind's Eye
Pink paislee ticket, stickers, border and alphas by Echo park
Jenni Bowlin journal spot
MME chipboard journal spot, star, tag
MME border
Maya road sheer calendars and trim
October Afternoon buttons
Twinery twine in cappucino
Crate paper photo croners
Sassafrass alphas
   Though I may have gotten a late start, I am not too far behind. I have my title page and the first page for January. My PL pages will be more about monthly happenings rather than weekly ones. So I think it will be easy to complete each month.  I always like to make an introductory page for each album. However, finding the right photo for those can be a struggle. The PL pages will be a nice substitute and an easy way to divide up my albums in a way that makes sense. Hopefully, this will translate to more pages and more stories to be shared in my albums.

Sunday, December 4, 2011

Becoming Mr. And Mrs.

    Every once in a while, it's good to follow the step by step instructions in the making of a layout. Why? It introduces you to a new technique without the stress and guesswork of what to do with the rest of the page. During November, I took a free class at Miss Arts Paper Crafting School. The class led me through a series of steps to add texture and dimension to my page. It was an enjoyable experience and led to the creation of a page that, while not my usual style, is truly wonderful.
   I did not have all of the materials suggested to complete the Layered Layouts class. Rather than purchase the supplies, I made a kit, attempting to match the supply list as much as I could from my stash. By doing so, the page became unique to me, despite the fact that I was following a series of step by step instructions.
Gesso
Pink Paislee glitter alphas
Glimmer mist in frost
Basic Grey paper clip
Tim Holtz metal tags
I-rock jewels
Basic Grey Wisteria paper
Making Memories shimmer flourishes-blue
My Mind's eye papers
Maya Road lace trim
Carboard
gauze from my first aide kit
Jenni Bowlin stick pins
Webster's Pages button sparkler
Maya Mist in Latte Metallic

 Though I may not use everything I learned in the making of this page, I will take parts of the process to incorporate into future pages.
  By completing the step by step instructions, I was able to learn the how and the why behind the page's design.I also learned that I love altering pre-made embellishments to meet my needs. I have always loved metal embellishments, for example, but never really liked the way they looked on many of my pages.They seemed to dominate aspects of the page. By altering them, I was able to give them a one-of-a-kind look and better able to blend them into my page's overall design.


The metal tags  have so much more character. I even think it's easier to read them now.
  This page will become the title page of my wedding album. Though it might not be my usual style, it's very special to me, both because of the amount of work I put into it and because of the end result.

Now it's your turn! Scrap Our Stash is celebrating it's birthday! Share a page or project you've made to help celebrate two wonderful years of using your stash in new ways!


Friday, October 28, 2011

First Gondola Ride


 I started off with just one page. I ended up with two! The page on the left is a  scraplift for the Pagerize this Challenge #15. Tamara's page was easy to work with and I was inspired enough to stretch over to a second page.


MME Stella and Rose papers, ribbon, chipboard button and sticker
Prima Jewels
MM chipboard alphas
Echo Park mini alphas
Paperframe designs acrylic snowflake
unknown twine
sei inke blue ink
Glimmer mist in elctric blue and black magic
DMC floss
On a trip we took this spring, my son rode on a ski gondola for the first time. I loved his facial expressions every time the lift took off from the station. Tamara's page allowed me to highlight this moment perfectly.
   Now it's your turn! Do you have a moment to highlight? Pagerize Tamara's LO and share it at Scrap Our Stash!

Tuesday, September 13, 2011

Reach for the Sky

Now you may think I had photos of us riding horses or spending time on a farm, but in reality, I have these photos of my husband playing with our cat. So how does that go with a western theme?He gets our cat to put his paws up in the air. It's very silly and a lot of fun to watch. It makes me think of a little kid playing cowboy and my cat is just sort of happily going along with it all.
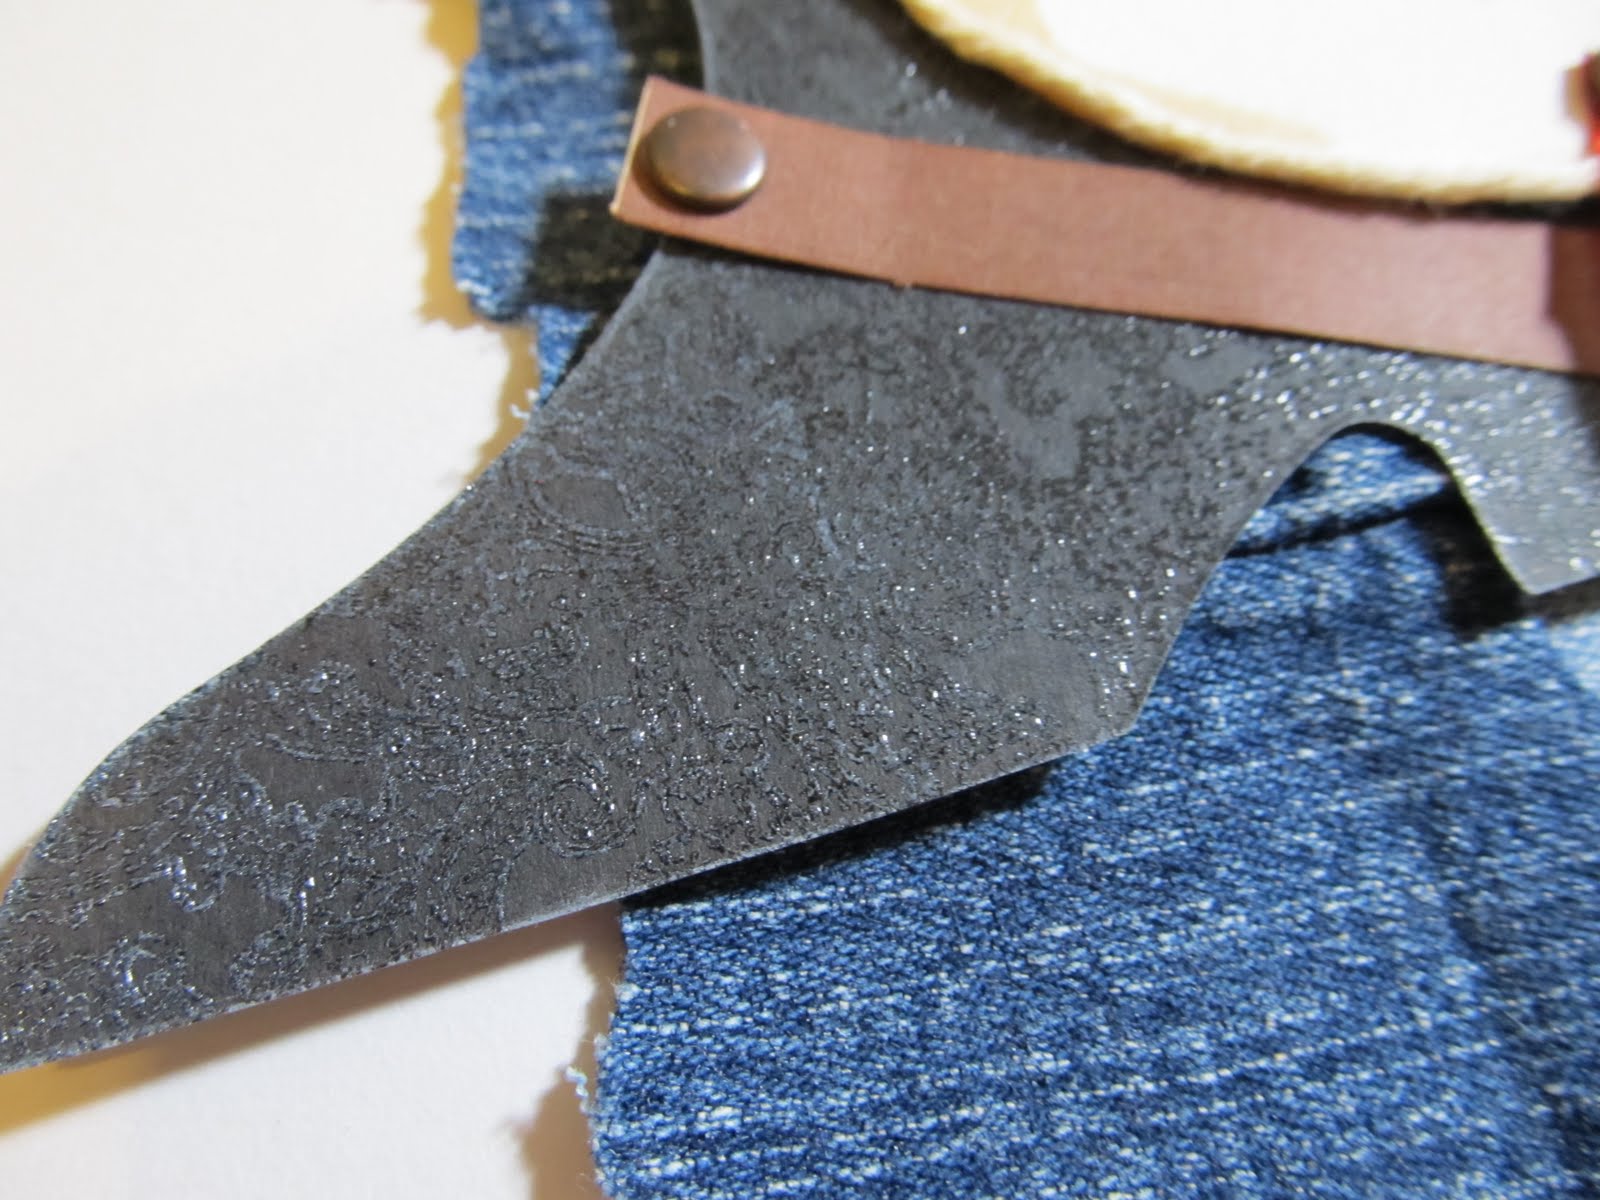
 So now that I had decided to go with a western theme, I set about trying to carry it to the page. I decided I wanted to use a phrase like " get your paws up" or " reach for the sky". I imagined using western themed papers and embellishments. However, in going through my supplies, I really had very little in that genre. What I did finally find were some die cuts, well over 10 years in age( still not sure why I have those. I bought them when my son was about two.) and some more current My Mind's Eye die cuts in a boy theme which just happened to feature a saddle. With die cuts in hand, I set out to find the perfect paper to go with them. I asked myself what reminded me of the western theme. I came up with denim, bandannas ,hand-tooled leather...all with a somewhat weathered look.
  For the hand- tooled leather, I decided to stamp and heat emboss the old boot die cut. It's subtle, but I think it gives just enough texture and adds to the theme.

 It reminds me of the fancy boots and leather saddles I saw as a child.
   I used an off colour cowboy die cut as a mask. The colour just did not work well with the rest of the page, but as a mask, it was perfect. I think I have discovered a use for all those old, plain die cuts sitting un-loved in my stash.
Sketchy Thursday 9-8-11 sketch
scrap of old blue jeans
sapphire glimmer mist
My Mind's eye die cuts
unknown die cut boot from the dawn of scrapping
i-rock jewels- brown square metal
Making Memories snaps(antique)
unknown gingham ribbon
colorbox chestnut roan ink

Leftover scraps from old jeans made the perfect background since I never could find just the right paper. Twine outlining the circle and accents of gingham ribbon also added to the texture and theme. All in all, a page proving that having specifically themed papers is not a necessity to set the right tone for your page.

Sunday, May 8, 2011

Day 2 of NSD!!!

First off...Happy Mother's Day!!!

It's been nice having so much time to relax and scrap this weekend. I have two more pages to share with you. Also, if you haven't checked it out,Scrapbook Challenges is having an NSD blog hop. You can start the hop here with Brynn's blog. The cool thing is that you too can participate in the hop by completing a Scrapbook Challenges sketch and then linking your blog to the hop. For my sketch, I chose a more current one.
Sketch 252 Scrapbook Challenges
Some items are from my Couterfeit kit for May
Echo park papers
prima flowers
making memories jewels
bread tags-recycled from pantry
recycled note pad cover, cut into circle then stamped with a studoi G stamp
colorbox white and chestnut roan inks
Plum pudding shimmerz spritz
making memories tiny type alphas
K and Co. wood veneer alphas
marth stewart opaque punch on vellum
Orange Bic mark it-faux stitching
I wanted to enter a current challenge while still getting a page completed. I love combining things. I get a lot of challenges done by combing them with others. It can be a challenge in and of itself, but it makes things a bit more fun.Which is why you may see this page at a few spots around the web like BPS, Frosted and Sketches for You. (hint: it will be part of an upcoming challenge over hosted by yours truly at Sketches for You). Since the word roguish means michievous, I wanted fun, playful colours. I paired them with pink and flowers for a feminine tone. My husband snapped this picture of our cat, Sweetpea hiding in the sink. She is always full of mischief but very girly...so I think the page suits her well.
  My second page features our other cat, Boo. He is one of those long slinky cats. I call him the contortionist, because he looks folded up when he sleeps. To capture the theme, I used bright colours and circus style papers. The paint and stars remind me of circus paint and clowns.
Sketchy Thursday 5-5-11
Sassafrass papers and borders
white paint
star punch
yellow stickles
My Mind's Eye chipboard frame centers
Colorbok die cuts-arrow and star
I chose to use some leftovers from some My Mind's eye chipboard frames. I wrapped them with thread and used them to frame the circles for a fun pattern.
  There is still a little more time to get in on the NSD fun. Don't forget about being part of the Scrapbook challenges blog hop. I am off to try to get a few more pages done...

Friday, May 6, 2011

Only You Can

This was going to be another simple page about my son and his boyish habit of playing with sticks. However, I decided to switch out the title. Something that simple can lead your journaling down a different path. in this case, that path led me to describe some of my son's best traits. I also, inadvertently, was able to place a little message in the text. I misspelled strength which led me to use acrylic paint to cover the error. It looked a bit unbalanced. This led to adding paint in other areas of the circle, including over some of the other words. I chose to use the words " capture, your and strength." Which leads to the little message for my son...Only you can capture your strength.

Pencil Lines  Sketch 236
Contents from my May Counterfeit kit including:
Sassafrass borders
Buttermilk colour acrylic paint
Recycled chipboard stars embossed with Swiss dots
Papers-My Mind's Eye, Fancy Pants, Sassafrass
Alphas- basic grey mini Marks
Sassafrass

Thursday, May 5, 2011

Quickly goes the page...

which one is inspired to make. I know I made a lot of great choices in my counterfeit kit because it was easy to choose photos, supplies and a sketch. The next thing I knew, this page had been made.
Sassy Lil Sketch 4-28-11
stars are recycled notepad cover, embossed with swiss dots
paper-My minds eye,sassafrass, fancy pants
I rock jewels
Sassafrass borders


My son is playing with sticks. Even my husband loves to play with sticks every now and again. Fun lives in simplicity sometimes. I chose the quote because I felt it was pretty apt. It reads: " A treasure to a little boy does not consist of money, gems or jewelry. He will find far greater pleasure in the wonder of a rock, pebble,stick or beetle." Author Unkown.

Friday, March 25, 2011

Frugal Friday Tip: Tin Can Recycling

  Last November, I got a Sizzix Texture Boutique. While I love what I can do with it, I really have not used it to its fullest potential. When I saw a recent tutorial about using soda cans and punches, I had the idea to dust off the texture Boutique and embossing folders to see what I could come up with. The results were quite wonderful!

Materials: Embossing machine and folders
               soda cans, rinsed out
               old scissors
               a Bic Mark it or other permanent marker
              optional: a child ( My son likes to use my embossing machine. So I cut the soda cans while he worked      
                 the machine.My son thinks this is great fun. )

You will need to carefully cut a slit into the can. Then remove the top and bottom. You are left with a curled piece of aluminium. Then it's just a matter of placing this into an embossing folder and putting it through the machine. I would just advise caution since the can is a little sharp after you cut it.

We experimented with a variety of designs. Some look better than others. You can use some punches to create your own shapes or use the permanent marker to draw a design of your choice.Then use old scissors to cut it out. The marker also comes in handy to draw an inked look to the edges of your cut shape.

I found glue dots to be the best way to adhere the shapes to my page. It's also very easy to punch holes  for brads with your paper piercing tool. You could also conceivably choose to hand stitch on your metal embellishment. I plan to dust off my alcohol inks to see how well they would look on my newly embossed designs.
Sassy Lil Sketches 3-14-11 design
Cream Acrylic paint
MME paper
Maya road Chipboard motif inked in Colorbox black ink
Paper Trunk Carson, black alphas
Black paint stamped with a round lid
DMC floss


All in all...a wonderful and inexpensive way to make your own page embellishments and recycle. If you have a Frugal Friday tip like this one, please share it at Scrap Our Stash.

Monday, February 28, 2011

Counterfeit Kit Challenge February Blog Hop

Welcome to the Counterfeit Kit Challenge February Blog hop!!!

  Blog hopping is always fun. I love seeing everyone's blogs and the inspiration they have to offer. I will admit, I often end up getting distracted and find my way off the trail of the hop. If you are easily distracted like me or did not arrive here from Kim's blog, just pop back over to the Counterfeit Kit site so you can get back on the right path.

I have really enjoyed utilizing the kit I made this month. There is always such a good feeling when I see a completed page...knowing a page is done and stash is used. I love my stash but it sure can be a bit overwhelming as it slowly consumes my dining room. I have quite a collection after around a decade of scrapbooking. Which brings me to my subject today...collections. 
  Some people collect stamps or magnets. I collect and acquire scrapbook supplies. My son collects action figures. They usually have a science fiction theme. He started doing this at the tender age of 3. He is fascinated with all things alien. In the last few years, he has acquired an obsession for predators. One morning, he decided to photograph his collection. Off he went with my camera, posing and shooting photos of his beloved toys. I was, at first, a bit unsure of the photos. What would I do with them? Being 10, my son is not the world's best photographer( then again, neither am I). As I examined his work, I realized that some of them could be said to have interesting merit. I had wanted to document his collection, so why not use his photos...his perspective. So I discarded the blurry shots and cropped some of the photos. In a weird way, they seemed sort of artistic. Next came the daunting task of finding the right papers and embellishments to scrap about his love of the most ugly of alien toys.

Scrapbook Challenges Sketch # 241
I quickly realized that the colors I had in my kit were perfect...black ,green and pink. In the right tone, they sort of could be, well...alien colors. I chose to smear black paint onto the page, then added a black K and Co. border for some tone on tone texture. Staples seemed a perfect accent to harden the scroll work of the border. I cut apart a Making memories pink leather frame. The leather reminded me of the alien's armor. The clear pink paislee flower reminded me of the crystal stealth predator and his weapons.

Counterfeit Kit Scraps of Darkness Sketch
 Hand stitching added to the rough grunge feel. On page 2, I used some basic grey flourish stamps with white ink. They reminded me of alien plant life. To add a touch of pink to this page, I used another scrap of the leather frame. I also added Shimmerz Plum Pudding spritz to the flocked MME Lush paper. On both pages, I highlighted certain photos by raising them with 3-d adhesive. It was a fun way to document one of my son's collections.

Thank you for stopping by. It's time for you to hop on to Melissa's Blog.  If you haven't tried it, I hope you try making your own counterfeit kit in March.

Saturday, February 19, 2011

Without Photos

  One would think it might be hard to scrap without a photograph. It can be unless you have something to say. In a recent challenge from the Counterfeit Kit blogspot, I was asked to do that very thing...make a page without photos. I ended up making an introductory page  for my fall album. As some of you know, Fall is my absolutely favorite time of the year. While I have blogged about it, I had never scrapped about it. Well, until now, anyway.

Once again, a wayward glimmer mist popped into my kit. The richness of the kit I had made seemed perfect for Fall...if only there was a tad bit of orange in it. So my Tiger Lily glimmer mist found it's way onto my page. Quite honestly, I don't know if that's allowed in this challenge. Nevertheless, it was the perfect fit and I am happy with the page I completed.

One thing led to another, and I scrapped another page using the same color scheme and some of the paper from my kit.

LOAD scraplift of Melanie Louette's Sweet Spring LO
I scrapped some photos of things that represent the signs of Fall: my car turning a year older, holiday decor showing up in the stores and on soda cans, and the decorations my son and I make together. I really enjoyed making the title for this page. I embossed some more scrap pad cover pieces, painted them black and then hand cut the letters. I think I can foresee my texture Boutique working a little harder in the near future as this was such a wonderful and inexpensive way to create a unique title.

 More stash used. More photos scrapped. Now how perfect is that?!?! Now I am off to find more photos to scrap with this kit!

Thursday, February 10, 2011

Our First Home

  I have had these photos for years. I guess they have been waiting for the perfect paper to scrap them with. At first, I was saving my Echo Park " Life is Good" papers for scrapbooking our current home. However, I reminded myself that new papers will come along shortly and I will inevitably want those...so therefore, use what I have now. Especially if what I have now inspires me.

  I have been working on a family album for my son( and for future generations). Documenting the view from our first home seemed a perfect fit for this album. I think it will be fun to compare these photos, taken around the time we moved in, to photo of the day we moved out. When I saw Gemiel's page, I knew it's layout was a perfect fit for these photos showing the view from our front yard.

Echo Park Life is Good papers and alphabet
glimmer mist in electric blue and viva pink
My Mind's Eye chipboard journal spots
I also shared the story of how we bought this house. Would you believe our down payment was just $10? The market was pretty hot at the time. If you saw a house, you made an offer. This house was the third home we had looked at on our first day out. We knew it was a good investment. It had been a model home and the builder wanted to sell quickly so they could move on to a new community. I did not have the checkbook with me and the agent needed some sort of down payment to hold the home. So we gave her my husband's lunch money. It was the only cash we had on hand, but it did the trick!

Now it's your turn! Share your stories and Pagerize this at Scrap Our Stash! OH...and if you are curious, here is our front yard:
The paper covers our address. Sometimes privacy is a good thing.;)

Friday, February 4, 2011

In the Sweet Sunshine

As some of you know, I am participating in LOAD211. Inspiration does abound everywhere... though sometimes it's presence is overwhelming. For this next day's prompt, I was asked to find inspiration in a song. It sounded easy enough. However...there are so many songs...so many choices. In my search, I came across a little challenge spot called Scrapping the Music. The song choice for this particular day was to scrap the tune "New Shoes." I am quite enamored with shoes. I am not enamored enough to scrap them right now. ( maybe I need to buy some some). Anyhow, as I perused the lyrics of the song, the lyrics" in the sweet sunshine" caught my attention. It seemed the perfect fit for the title to my summer album.

Club CK one hour  challenge page
Two Peas in a Bucket Sketch

    I decided to use the Two Pea's In A Bucket January Stretch your sketch. It worked perfectly with the photos of my son and husband's shadows. I love how I captured them holding hands.The red happy pattern of My Mind's Eye's Penny Lane reminded me of the sun and the Lush Flocked chipboard was the shadow. I dotted the eye with a random sunshine button from my stash. It was so nice to find a use for it. It had been hanging out in my stash for quite some time. Since I did not have the perfect mini alphas, I made my own with a pen and some scrap paper. I cut a cream border using the reverse side of the paper and layered red tulle across the top. Kraft paper toned down the bright burst of red.My new favorite pens(Bic Mark it's) came to the rescue: tuxedo black for hand stitching and rambunctious red to color a Maya Road chipboard accent. A few stick pins(salvaged from the packaging of my husband's new shirt) added the final touch. 

Thursday, December 16, 2010

The Best Gift of All

Holidays and birthdays are often about the giving and receiving of gifts. For me, the best gift of all( and the true meaning of each celebration) is the warm, happy feeling I get from giving the gift. My son's birthday is no exception to that.


This is actually the title page for the layout I did recently in the Pagerize challenge. I used the rest of the My Mind's eye complete boy patterned paper sheet here as well as more of the Making Memories Just Chillin' Boys die cuts and trims. I used My Tim Holtz embossing folder, but instead of the whole sheet, I cut a star and a crown from it. They make nice accents at the top. I hand stitched around the star to make it pop out a bit more. I cut the K and Co. border into strips, using 3-d adhesive on sections of it for more dimension. You may be wondering about the little frame on the photo. Well, I just had to highlight my husband sitting there smiling.


You see, he also enjoys giving gifts to our son. You'll have to pardon the photo. One of my New year's resolutions is to learn to be a better photographer and to improve my photo editing. When I originally shot these photos, I was focusing on my son and not what was going on in the background. When I later saw my husband sitting there smiling, I knew this was one of those instances in which the background was really important to the story. I edited the photo as best I could, but as you can see, the lighting still hides my husband a bit. I chose the frame to draw more attention to him.


I hope you'll share your birthday celebration layouts with us at Scrap Our Stash. I know I can certainly use some heartwarming cheer during these cold days of December!

Saturday, December 11, 2010

A Birthday Theme

Since this month's theme at Scrap our Stash is all about birthdays, I decided that now would be a great opportunity to finish off my son's tenth birthday photos. I also used my new birthday present, a sizzix texture boutique, to make an embellishment for the page. While gifts are a great thing about birthday's, the best gift for me, as a parent, is giving them to my son. His joy sparks mine and inspired the journaling for this page.


In my take of the pagerize challenge, I chose to use wallet size photos and to place them into groups. I used the placement of the original page's pictures, omitting one, as my inspiration for placement. Rather than regular birthday theme papers, I chose paper from My Mind's Eye's complete boy collection and embellisments and trim from Making memories Just' Chillin' Boy collection. The bingo card was made on coredinations cardstock with a Tim Holtz folder.Small star brads finally found a way out of my stash and onto the paper to add to the star motif. I hand stitched around a star on the lower right corner to add some color and texture. I actually fussy cut that star from the above patterned paper strip. The bingo card hides the hole perfectly. Another stash saver I utilized here was the method in which I matted the photos. It also saved me time. I simply chose to leave a small border of white photo paper around each photo when I cropped it from the main sheet.

If you want the recipe for a fast, fun page than pagerizing is a great way to go. The inspiration is right there for you to take and make your own. We'd love to see your version of the challenge...so don't forget to send it in!

Saturday, October 2, 2010

Hidden Messages

  Do you ever leave hidden messages on your pages? I really have not thought to until recently. Earlier this year, I chose to use a pocket for journal tags when I ran out of space on my page. On a more recent LO, I chose to use a hidden tag because I hope someday it will be a nice message for my son. One he'll understand as he grows up. I probably would not have done this had it not been for the recent Project Scrapbook challenge at Challenge Masters. I had to do a page about me...which is not my favorite topic. I would far rather scrap my wonderful son, handsome hubby or quirky cats. However, Given the challenge, I chose to make a page for my son ( and hopefully soon, one about his Dad) which tells him a little about me, my hopes for him and some facts about the time when he was born.


   I have wanted to include more of my son's art work in my pages, so I used this drawing he made of he and I if we were mice. I sewed it into a pocket on the page. I loved the warm cozy feel of the My Mind's Eye Be Loved papers. They reminded me of a quilt, so I used this Sassy Lil' Sketch:

I fussy cut some of the paisleys from the blocks of paper and used 3-d foam to make them pop. From the title block, I cut the word "mom" and then wrote variations of mom on the paper. I covered it with vellum, and once it was stitched on, added the word mom back with 3-d foam. The flowers were hand made from a wonderful tutorial found here. I made mine smaller using some scraps left over from making the blocks. Just remember to keep all of your paper strips the same length and to vary them in width by 1/4 inch. I finished the project with prima trim and K and company border stickers from the poppyseed collection.

If you do make the flowers, pop on over to Sketches for You. DT Member Brenda was the one who offered the tutorial and she has a monthly challenge with a RAK for you.

Saturday, September 25, 2010

Go Green Challenge

Recycling is always a good thing. With acid free mist, there is a whole new world of possible embellishments or items that can be incorporated into a scrapbook page. When my son recently had a birthday, I had decided to make him some cinnamon rolls as a special breakfast. I decided to save the packaging and use it in the layout.


As I mentioned before, You will need an archival or acid free mist spray. You can follow the directions on the can to preserve the label or item for your page. I highly recommend NOT using anything that has been touched by food. As you can well imagine, it just might not be good for your photos. Labels though, can be a great way, not only to preserve the moment, but to also give a little look back at the way things were. Think back to how many times advertising and labels change with the trend. It just might take you back on a little trip down memory lane.

The other cool thing about this page is that I used scraps left over from creating the left side of the page. The polka dot paper is My Mind's EYE while everything else is Cosmo Cricket's Early bird line. Even the coffee mug sticker border was a scrap. I had cut it apart to use on the previous page.

The flowers used on both pages are Prima. For other ideas regarding  recycled items for projects, check out Scrap Fit's Workout#28.

Friday, September 10, 2010

Then and Now: One Concept, Two Takes

 Recently, I did a one hour challenge at club ck. I was very rushed. My son needed help with school, and that comes first. So after assisting him, I had about 30 minutes left to complete the challenge. I almost didn't...but then thought. What the heck, let's give it a go and see what you get. The overall result of my 25 mad dash of scrapping was not horrific. I had pulled out my Cosmo cricket earth love kit to make it easier on me. The challenge centered around showing a timeline of change. So I had quickly pulled together photos of my son highlighting 4 years of his life. I was in love with those photos. Each one depicting his sweet self at each wonderful stage of life.


There was just one problem...I was bothered by the fact that in my haste, I had covered my Sweet boy's hands in one of the photos. Not to mention the fact, that though I loved the border with the birds, as whimsical as it was ...it just wasn't working for me.


I generally come to a point in which a page is just considered done. This page, though simplistic, was important to me because it depicts my son's growth from 2001 until now. So I ended up making the page over. When I pulled the bird border off, the page was damaged. I wanted to salvage it, so I used an Martha Stewart punch to create a border on Cardstock. This, coupled with the Making memories ladybug trim from the Flutter collection, maintains the earthy feel of the paper while hiding the rips and tears. It also adds a little dimension to what was before, a very flat, basic page.


I changed the buttons from blue to yellow for a pop of color and also because the light blue just did not match the turquoise of the ladybugs. Though the page is still simplistic, I corrected what was bothering me about it and I feel, made it a little more interesting.

That being said, I will be shortly popping over to Scrapwhispers to enter this project in their "Then and Now' challenge.  I also have some future then and now projects planned. I would love to scrap about my son's change in favorite cartoons and also do a timeline for video games we have played from "then to now". So stay tuned...

Monday, September 6, 2010

Cosmo Cricket Inspiration

  Recently, I felt very lucky to get my hands on some Cosmo Cricket kits. One I was lucky enough to win in an RAK. The other kits, I purchased for myself. I felt like it was about time to stop mooning over the kits and just get myself some. I am so glad that I did!

  Cosmo Cricket just posted an inspiration challenge to their blog. Using the cover of the home page, in this case, the pad of Pixie-licious paper, see what kind of project you could come up with.

I loved the block design of the pad's cover. So I went with that...but used the get Happy collection since I was scrapbooking about my son's favorite toy. To make the base CS a little more grungy to match the paper, I used some Black Magic Glimmer mist. I cut blocks out of the paper and then rounded the corners before placing them in a pattern similar to the cover's.


It's been a little while since I learned about the visual triangle. I recently signed up for a class at Masterful Scrapbooking design. In it, they talked about colors being used as part of that visual triangle. To be honest, I have done that before...but I was never aware of why I liked the effect. Armed with my new found awareness, I placed the blocks precisely to form the triangles. BTW, the only non-get happy pp is the arrow block. It's from the boyfriend collection. Somehow...I just felt that it went along with everything quite well. I used some stamps and colorbox Prussian Blue ink to make the title. I provided a little separation with some hand stitching. For visual interest, I added some staples and some hand stitching to the polka dot strips. The polka dot strips had some light blue lines...so I just followed those.

  Now...you might be wondering what the story is here. My Husband and son play quite a few video games. Starcraft had just come out. DS asked if there were any toys to spend his birthday money on. When we looked on-line, there was only this action figure on Ebay. He's a collector's edition from Blizzcon. He usually goes for over $70 in the auctions. So when my son asked to bid, I told him he could, but not to expect his birthday cash to be enough. When the bidding ended, we were all surprised that his $35 won him the toy. He is now my son's favorite thing.

   Well, what would this story be if I didn't scrap about the game. So on to page two... I scanned the covers of the box and then journaled some fast facts about the game in list form.


And while I am posting Cosmo cricket pages, I just had to share one more...

I used Early Bird to scrap about my son's birthday breakfast. This was a scraplift assignment from Sketches for you. I will admit...the polka dot paper is My Mind's Eye. I substituted it for the polka dot paper in the Cosmo kit b/c I really want the pattern on the other side of it for another page.


Thank you for looking. Don't forget to check out all of the great inspiration at Cosmo Cricket.