Showing posts with label sketches for you. Show all posts

Saturday, July 2, 2011

So Much Energy

  I wish I had it. My son and his friends all seem to have it. Energy, that is. Kids seem to have it in overwhelming abundance. So it seemed fit to scrap these photo of my husband pushing my son and his friends on a tire swing with some bright energetic colours. The title sort of found me via the Scrap it With A Song challenge spot.
All papers and embellishments are from Echo park except:
notebook paper-Basic grey
brads-Basic grey
white CS-colorbok
blue cs-coredinations

Oh and speaking of energy... I hope you have enough to participate in a hop going on through scrapbook challenges. You can start at Brynn's blog. Brynn even came up with the sketch I used for this page. I love the fun banners which were perfect for this upbeat page. It's always fun to see how different people interpret a sketch. So if you'd like to see some other variations, check out the links found here.
 Sorry for the short post, but life is hectic right now. I am pleased to have found a little time to scrap. I am less pleased with myself for not reading all of my challenge list properly. By that, I am referring to the notepad I keep listing all the challenges I want to participate in. I had several I wanted to do for Sketches for all. I thought I was completing one of the challenges with the above LO only to find I was just supposed to use 1 flower and not three.Oh well! Back to the drawing board. I at least have another page done that I like. Happy scrapping everyone!!!

Friday, June 10, 2011

0001110101

   I have no clue as to what I may have said in the title's sequence of numbers. If you are not familiar with these types of number sequences, they are the language of computers. My son is sure getting curious as to how he might translate the way a computer speaks. So to that end, I bought a homeschool computer programming course for him last fall. I say it's for him, but truth be told, it's for both of us. This is all so new to me that I have to learn right alongside him. This has caused quite a few challenges for us in a short time( I am not very savvy with computer programming), though I do enjoy learning something new. It's nice that my son can see, first hand, that even adults learn new things. Learning should be something that does not ever end.
  As boring as programming may seem, I was stoked when my son programmed his first text box which proclaimed " hello world" as it popped up onto the screen. I took a lot of photos of the text box and my son working diligently at his computer. Now I needed an interesting way to document photos that, while a huge milestone for us, were in reality quite mundane. Page one was completed last fall.
                                                       
Sassy Lil' Sketch made for Sketches for All's Fall Sketch-a-thon
DCWV Tech generation Stack paper
Bazzill Silver CS
Pink Paislee alphas
DMC floss
MISC. ribbons stamped with colorbox white or black inks
Basic Grey Brads
Black magic glimmer mist
  DCWV had made this wonderful computer language paper in its' tech generation stack. Paired with the Metallic silver card stock, it perfectly symbolized computers and technology.I used some chipboard numbers to create a mask for some black magic glimmer mist. I carried the number patterns off the patterned paper using DMC floss to sew little ones and zeroes onto the page. I stamped more ones and zeroes onto ribbon. It varied the embellishments a little while at the same time, continuing the theme of computer progamming. In the end, I had a layout I loved. However, I still had enough photos and paper scraps for one more page.
  Those leftover photos and paper scraps sat waiting  until recently when I saw the Pagerize This #10 challenge at Scrap Our Stash. I decided to make a page which highlighted my son's dreams of becoming a video game programmer. In place of Lea's block of rub-on's, I used the chipboard numbers to once again make a mask. I chose to use 3 photos rather than just one. I had just enough white space on a photo of the computer screen to place my journaling.

 Scraps of paper and ribbon from the first page were arranged around the photos in such a way that they gave the appearance of creating a background of data strips behind the photos.

In reality, as you can see from the  picture above, the scraps are just sort of tucked in underneath the photo. This method is both a wonderful way to use scraps and a paper saver. I use this with papers of all sizes. It has allowed me to really stretch my stash just that much farther. From the photo, you can also see a close up of the stamped ribbon. Stamping on plain ribbon is another way to optimize the theme on your page. Plain ribbon can often be found in large rolls at the fabric store and is much less expensive than printed or fancier ribbon. It's something I plan to add more of to my stash in the future.
  From the original page down to a wonderful scraplift made with, well quite literally, scraps, I have two wonderful pages documenting my son's dreams and one of the milestones he reached in getting there. There is still time to pagerize Lea's wonderful page. Pop on over to Scrap Our Stash to check out Lea's page and to submit your work. We'd love for you to share it with us!
                                                            

Wednesday, January 26, 2011

Someday

   As part of a recent writing assignment, my son was asked to illustrate and write about places he would like to visit. One of those places was France...or more specifically, Paris. I was struck by how passionate my son became as he talked about what he thought Paris was like. I felt like this would be a great moment to capture...one of my son's dreams. I think someday it will be neat to reflect back upon this page...especially if we ever get to visit Paris.

Sketches 4 All January Gallery girl Scraplift
  To capture the romance of Paris, I chose this older, cream colored paper from my stash. I don't know who makes it, but I do love the look of the white on cream words and phrases printed on it. For a Masculine vibe, I chose to go with a black, green and blue color palette. The Making Memories and crate paper patterned papers were a perfect fit. I mixed in some Crate Paper die cuts with Restoration border stickers, along with pink paislee chipboard, making memories flowers, and some office supplies. I must admit, that when I received the package of Pink paislee chipboard, I never thought I would find a use for the Eiffel Tower!

Scrapfit,workout#36
Scrap Whispers challenge #86
Frosted designs 1-25-11 Sketch

 The journaling was done on a Maya Road sheer ticket. A Tim Holtz compass mask with black magic glimmer mist adds to the travel theme. A fun set of pages, and a fond memory...and maybe Someday, there will be some photos of us in France.

Sunday, January 23, 2011

I really didn't like that!

   That's what my son told me when he saw the pictures I had printed. They were photos of him and his Dad riding "Storm Force Accelatron" at Islands of Adventure. Both he and his Dad thought they would be getting on something akin to The Mad Hatter's tea cups at Walt Disney World. Let's just say this ride was not quite so tame.
   While they both were not fond of the ride, I am fond of the Layout I made about their experience. Since the ride was about Storm, from Marvel's X-men, I used white paint to create a tornado. To further the effect, I smeared and splattered Black Magic and Glacier glimmer mist, then drew swirls with a pencil. The fun, colorful polka dots of SEI's monsterville paper seemed the perfect complement to a theme park page. using a Kraft paper background softened some of the bright colors and busy action.


also submitted to Frosted Designs 1-21-11 challenge
 I made it a point the day we were there, to photograph the ride's sign so I could use it as a title. I fussy cut this out of the photo, along with Storm. I made Storm jump out from the page with some 3-d foam. I left part of the white boarder from the photo paper when I cropped down these wallet size photos for page two. it was a time saver and also helped me create separation between the busy blurred images. I wanted the photo of my husband and son exiting the ride to be set apart. So I mounted it on a chipboard block and added a transparency to it. The transparency said "you and me" on a small corner. I found these cloud and lightening shapes from American crafts Vinyl Teen to be perfect( prior to this page, I had no clue where I was going to use them! ). I used them to cover the word on the transparency and then as accents on the page. Green and black sequins add the finishing touches.

I completed this as the January Scraplift Challenge over at Sketches 4 all. My Fellow DT Stacy made this page for us to lift:
Made by Stacy Rodriguez

As you can see, mine changed quite a bit from the original. That's the beauty and the fun of scraplifting though. Maybe you should give it a shot...post your creation over at Sketches 4 all!                              


Tuesday, January 11, 2011

Warm Wishes

   If you live in a cold climate, then this page may very well make you laugh. I live in a tropical clime and recently, we had a cold snap with record low temperatures. I took a photo during the afternoon of our patio thermometer. I like to document the weather. I think it's good to remember that, wherever you may live, the weather is sometimes the same, but at other times unexpected. I know that's a given...but I also know many times we have a tendency to overlook such small details. Those small details may prove interesting later on. But I digress...

   So back to the page at hand. We reached a high in the low 60's. It's not really a big deal...except when you factor in that we have no central heat. We live in a place that rarely gets this cold. So this means that the house is only 3-5 degrees warmer than whatever it is outside. So this was taken during the day, and you can well imagine when the temperature dropped 10 plus degrees at night how cold the house was. For us it was freezing! We survived though...bundled up, with lots of hot cocoa to drink and some warm wishes.


Some of you may recognize the cute snowman 4x6 card from the WE R Memory Keepers merry January line. I love the paper. For whatever reason, I thought I'd be satisfied with the 4x6 pad. I don't know why I thought this. Anyhow, since I am currently on a spending freeze, this meant I had to get really creative with my stash. The white polka dots of MY Mind's eye's Andrea Victoria line reminded me of snow. Since the color seemed to fit well, I added the matching black sheet and then inked both with colorbox white ink. For a little added texture, I ran some leftover clear packaging through my texture boutique with a Swiss dot embossing folder.

I sanded it a bit and then layered on making memories chipboard snowflakes and lush brads. Some prima lace and hand stitching finished off the page. If you like the page design, then check out Sketchy Thursday's Jan. 6th post. BTW, there is a wonderful challenge to scrap about winter over at Sketches for all in the challenge forum. Maybe I'll see some of your creations over there. I hope so. Meanwhile, I am off to start page 2...

Monday, November 22, 2010

Authentic Cattitude

Yes...she has it! Not usually. Just in this photo I took of her. You see, DS likes to leave boxes in different spots around the house. No one was sure if the cats would fit...but we wondered if they would try. Sure enough...Sweetpea hopped in and fell asleep. I tried my best not to wake her as I took her photo. As you can see by the groggy look of disgust, I failed. LOL

This is a page maps sketch completed for Skethes 4 All's sketch crazy contest. I recently took the "6 layouts,1 kit" class from stash to treasure and so I decided to employ a new technique here. I stamped on the back of the cardstock with some Sassfrass flower stamps. I wish I had a background stamp...it would have turned out better, I think. I then sprayed glimmer mist in silver sugar over it. While it was wet, I tore a circle in the center and rolled the paper.

You can see some of the flowers on the rolls, just a little. All of the papers, borders, and flowers used are from Sassafrass.The blue lace is prima. I hand cut the leaves from scraps. The blue leather frame and blue brads are MM Chloe's closet. I cut the title on my cricut using Ck beantree font and SCAL. the rub on is BG two scoops.I used a Jenni Bowlin pin and some metal pins from the fabric store. ( I heart metal pins now!BTW...they are just such an easy way to add a little something more to a page!)

Overall, I loved the class at Stash to treasure and hope to take more there. I am so glad that I was able to try it out. Sometimes taking classes helps me to push my limits. In this case, I always liked the torn frame...just not usually when I did it on a page. I think I most often don't like a technique when i am just not used to using it. I am going to push myself a little more out of my comfort zone and see what i can come up with...

Sunday, November 21, 2010

Climb: an exploration of inspiration

   Paint can be a tricky medium. It looks awesome on a page but yet, it is such a permanent thing to commit to. It takes a little getting used to when you are trying it out on a page. I find that the more I use it, the more comfortable I am becoming with it.

For " Climb" I felt that paint was just the thing to use on the page. It's a page I completed for a combination of challenges at Sketches 4 All. One challenge being a scraplift and another being an ad inspiration challenge. I also added the challenge to use circles on the page and my own posted challenge...to make a hand made embellishment. Here are the 2 inspirational pieces from which I created my own page:

by Stacy R.


ad inspiration challenge photo

The basic design of Climb is a very close scraplift of Stacy 's page. I have been wanting to go back to basics...back to when I frequently used pens or markers on a page as part of the design. I did that a lot when I first started scrapbooking and somewhere along the way, I forgot that pens were for more than journaling. I used my new Bic Marc it's to draw a border around the white paint on the kraft paper. Overall, I placed many of my page's elelments the same way she did.

From the ad, I took the color. I love the bright splash of green and orange on the white. Those colors instantly drew me to the trees in the Jillibean Soup papers. However, the black base was too much, too strong. So I chose a more organic approach with the kraft paper and the browns. It also better matched the outdoor photos. I loved the repetitive circles of the trees. So I fussy cut some more Jillibean paper and made the circle into scallops. I used papertrunks circle pattern from the Batik collection to stamp some white circles onto kraft. Layering this trim over the scallop provided a more finished look to the page. I fingerpainted a circle onto a piece of scrap kraft. Some handstitching and painted rays made a sun. However, the sun was still flat. Stitched swirls similar to the splashes of paint in the ad provided a more complete and interesting  sun. A Handstitched title and date ad to the homespun/natural tone. The bird( from K and company) completes the nature imagery.

I am definately more comfortable with the paint than the times I have used it before. It's easy to combine challenges and inspiration into one page. It can leave you with a wonderful page that you love and enjoy sharing.

Wednesday, November 10, 2010

a Bright and Happy Sketches 4 All DT sketch reveal

WOW...it's been a few weeks since I have posted. I must admit that family illness and travel have left little time for blogging and sadly, scrapbooking. I did manage to find a little time to complete the DT sketch for Sketches 4 All. I am honored and excited to continue to be a part of their Design team. I was also happy that this sketch helped me to complete a page that was several months overdue!

My son has a fascination with most things SCI FI. He gets it from his parents. What can I say...except that it's very awesome to share something in common with him that both my husband and I love. In the past few years, my son has developed an obsession with aliens. When he found out that we had seen an alien statue at Planet Hollywood in Orlando, he requested we take him there for a birthday lunch. We happily complied...however, it's been so long since my DH and I have been there that many things have changed. Including the props showcased there. The alien is no longer on display. We did enjoy a nice lunch and DS got to see many sci fi related props. It was still a great trip. I love that they take your photo as you go in the door. I have a wonderful photo of my DS.

I sprayed some of the napkins with archival mist and found they worked great with the page. Kraft paper toned down the rich purple photo frame. I pulled the red and yellow from the napkins. I used borders punched from a swap I was in and added a purple recollections Halloween border. The I-rock allowed me to easily add some bling to the prima flowers and border. The tickets were from a Rak I had just received. I am a sucker for these little tickets and was so glad to use them here...along with the silver hat pins I have had in my stash for months. Now I am hat pin crazy! LOL You may be seeing them on other pages. Stay tuned for page 2 of this layout....

P.S>since I love the bright colors of this page and since it just makes me happy, I am submitting it over at Scrap Whispers!
P.P.S.Don't be surprised if you see this at frosted designs 11-5-10 challenge. ;)

Saturday, October 16, 2010

Halloween Bonanza

  If you don't know by now, I love Halloween. I love the costumes, the trick or treating, carving pumpkins...well everything! Sadly, I am WAY behind in documenting the photos that go along with this holiday. So, with many recent challenges focusing on this spooky holiday, I took the opportunity to use some of my new BG Eerie paper to get those photos onto paper.

Let's Scrap sketch 10-13-10

Pumpkin carving is a favorite family pastime, so I wanted a fun, pumpkin theme page. Add to that the fun of incorporating your senses into the page...for carving pumpkins is a very touch based experience. Orange Cardstock set the mood and I loved the textured feel of the embossed felt pumpkin trim from Recollections Autumn collection. To add to the sense of touch, I used Chatterbox corduroy brads to hold twine and handmade felt banners. I found the poem on-line,printed and stamped a tree onto the background, then used colorbox inks in chestnut roan, olive and creamy brown to mimic the tones in the BG paper. I did the same with the title. Hand stitching added a warm cozy feel while i-rock jewels and orange peel stickles added a little glitz to the pumpkin stamp.

To scrap the trick or treat fun, I used Eerie papers over a DCWV purple Cardstock base. This is a hybrid page. I used a printed title from CLUB CK which I fussy cut and distressed with colorbox inks. I also distressed a prima flower with black ink, then added an Eerie brad for the center. This was the first page I had made with my new I-rock. I love how easy it is to put on jewels. The trim is from my local fabric store. I have been finding some great deals on trims and lace there.

completed for Sketches for All Sketch-a-thon

I love how the many challenges out there get me in the mood to scrap. There's a ton of Halloween challenges right now from the Halloween party at Sketches for All, Workout #30 at Scrap fit, to the Halloween/Fall challenge at Frosted.  Also, don't forget to submit to Scrap and Stamp Saturday if you use a stamp on your page. So go on out there...find challenges, make pages!

Monday, October 11, 2010

DT Sketch reveal at Sketches for All

  It's another wonderful month full of sketches and challenges at Sketches for all! There is a Halloween sketch party, The Sweetest day challenge. Not to mention all of the great challenges my fellow Design Team members are hosting. I am really enjoying being part of the Design Team. We had another great sketch to complete for the big reveal today! You can see my fellow DT's sketch at the main site.

Here is the sketch we were given:

I chose to scrap my son's birthday cake since we are focusing on sweet things this month. I even incorporated the whole  birthday song on the page! I used CK's happiness font which was a perfect fit.


The papers I used have been in my stash for so long that I don't even know who makes them. I am glad to use them up for such a fun page. I used some of the papers to roll into candles which I bundled with some fun fiber. To make the rolls look more candle like, I used some EK success Floss which I inked with black colorbox ink(to look like scorch marks). The ribbon is from a swap and I used a new Martha Stewart punch on some musical paper( which I felt went great with the song lyrics). I doodled for an easy added pop to the page and added some jewels with my i-rock to a sassafrass stamp. It was a fun happy page! I love that I have pink accents but they don't feel girly at all on this layout.

I ended up making a wonderful two page layout. I used some K and Company Stickers on both pages.

The ribbon helps both pages connect and flow together. I was also able to get the correct number of candles for my son's age by using them on 2 pages. I hope you like my page...but I also hope you'll check out all of the great examples at Sketches for All! Don't forget to share your own take with us there!

Saturday, October 2, 2010

Hidden Messages

  Do you ever leave hidden messages on your pages? I really have not thought to until recently. Earlier this year, I chose to use a pocket for journal tags when I ran out of space on my page. On a more recent LO, I chose to use a hidden tag because I hope someday it will be a nice message for my son. One he'll understand as he grows up. I probably would not have done this had it not been for the recent Project Scrapbook challenge at Challenge Masters. I had to do a page about me...which is not my favorite topic. I would far rather scrap my wonderful son, handsome hubby or quirky cats. However, Given the challenge, I chose to make a page for my son ( and hopefully soon, one about his Dad) which tells him a little about me, my hopes for him and some facts about the time when he was born.


   I have wanted to include more of my son's art work in my pages, so I used this drawing he made of he and I if we were mice. I sewed it into a pocket on the page. I loved the warm cozy feel of the My Mind's Eye Be Loved papers. They reminded me of a quilt, so I used this Sassy Lil' Sketch:

I fussy cut some of the paisleys from the blocks of paper and used 3-d foam to make them pop. From the title block, I cut the word "mom" and then wrote variations of mom on the paper. I covered it with vellum, and once it was stitched on, added the word mom back with 3-d foam. The flowers were hand made from a wonderful tutorial found here. I made mine smaller using some scraps left over from making the blocks. Just remember to keep all of your paper strips the same length and to vary them in width by 1/4 inch. I finished the project with prima trim and K and company border stickers from the poppyseed collection.

If you do make the flowers, pop on over to Sketches for You. DT Member Brenda was the one who offered the tutorial and she has a monthly challenge with a RAK for you.

Wednesday, September 22, 2010

I have Tree Love!

   No, I am not out hugging any trees or anything like that.  I have a wonderful kit from the new Nikki Sivils collection, Tree Love. I can not tell you how very excited I was/ am for the opportunity to play with these gorgeous papers. I was also excited to hear, that Nikki herself was going to have a contest as part of the Sketch-a-thon at Sketches for All. It's always a lot of fun to see how different people will interpret the same sketch. It's even more interesting when several people have the same kit. Who knows what each person will come up with!?!? It's like a little paper adventure.

So now, I sat with ATG and scissors in hand, armed and ready with Nikki's sketch and her example.
                                     
Sketch Nikki Made for the Sketch-a-thon. Now how cool is that!
Nikki's example. ( I wish I had a dog like this one! Isn't he just awesome!)

 I had a wonderful selection of the 12x12 papers from Tree love, the matching 6x6 stack and some interesting embellies to choose from. I just had one problem...on one particular piece of 12x12 paper, I was in love with both sides but only had 1 piece! Now what's a girl to do? Get creative, that what!

So, I cut the tree border from one side. I then flipped the paper over.

I gathered my paper piercer, a pencil, and my plastic canvas square(which I use as a template). I then carefully marked and pierced holes to stitch the two pieces back together. * You want to be very careful not to pierce to close to the edge, as the paper will rip. Flimsy paper is also not easy to work with. You need a nice, heavy weight paper, like Nikki Sivils' so that the paper does not crumple as you work.

I next took some DMC floss and began stitching a zig zag pattern. So that the paper would stay better aligned, I stopped part way and then went to the other side of the paper. This anchored the two sheets together, which also made stitching the rest much easier.

* Just make sure, that if you choose to stitch a pattern as I did, that the  pattern will properly meet up in the center. Also, don't pull hard on the thread. You want it taut, but if you pull too hard, you will warp the paper and make it uneven.

The stitching reinforces the paper and holds it together. You could also just choose to adhere a strip of cardstock as reinforcement, rather than taking the time to stitch. if you don't want the slit to show, then substitute a paper border for the stitching.

Little tricks like these allow me to make the most of coordinating pattern papers. I will also say, that I LOVE 6x6 pads of paper. Though small, they pack a lot of bang for your buck. I used 1 sheet of the Tree Bark paper on the LO above. I simply cut blocks from it, inked the edges with Colorbox dark brown ink and adhered in the mosaic pattern shown. To make the leaf embellies, I punched the leaves from a 6x6 sheet of Be green paper and used my black marker to draw the lines. I drew 2-3 sets of lines to mimic the black lines on the trees of the border design. As you can see, Tree Love was the perfect paper to bring out the rich color of the caramel and that warm,cozy feeling of Fall. Everything on my page is from Nikki Sivils collection except for, the DMC floss, the ribbon(found in my scraps) and the title( which is an October Afternoon rub-on).

I also made a card utilizing Nikki's sketch. It's very easy to use card or LO sketches for any paper craft. Just remember this simple rule: You don't work for the sketch, the sketch works for you.

So be creative with what is around you. To see how my fellow DT girls interpreted Nikki Sivils' sketch, come on over to Sketches for All. I hope you'll also share your interpretation with us. If you do...you might even win a prize!                                                                                                                            

Tuesday, September 21, 2010

A Sassy Lil' Sketch

As you know by now from my previous post, Cherie from Sassy lil' Sketches is a guest at Sketches for all. We are so excited to have her there as part of the sketch-a-thon. I thought I would share my take on her sketch with you.


Yes, I rotated the sketch...and you can too. ;)

Since the sketch-a-thon is all about school and Fall,  I decided to do a page about my son learning computer programming. I used paper from DCWV's Tech generation stack. Since computer language is all 1's and 0's, I used them all over the page. I used Black magic glimmer mist and chipboard numbers to create a mask for the background. I stamped numbers on ribbon. I even was crazy enough to stitch them as a border on the page. All in all, I love the effect it made.

There is still a few days left of Cherie's contest. The sketch-a-thon goes on all month and we will soon be visited by Nikki Sivils. So pop on over...you have plenty of time to play!

Saturday, September 11, 2010

make your own ruffle trim

   Ruffled trims have become a big trend in the scrapbooking world. I have always thought they were a pretty touch. Notice I said pretty. Well, that's because many of them have a feminine look. So I never chose to add any to my stash. So, when I saw a tutorial over at Ella to make your own trim, I was very excited. What a wonderful way to make the trim fit my boy themed pages.

  My page centers around my son eating a lollipop. During Bahamas Independence day, it's a wonderful tradition to head over to Mortimer's candy shop for some of their home made confections. My son looks forward to it every year. The lollipop is made in the colors of the Bahamas' flag. I had found this wonderful ribbon which also had these colors. So I chose that in place of felt for my ribbon border. The border was very easy and quick to make. I am in no way a great seamstress, but found that it didn't matter with this. Your stitches don't show and it's haphazard feel adds a fun tone to your page.

The sketch comes from Scrapfit's workout #27. I chose to try a reverse mask with paint and to extend the circle design onto the 2nd page. I always have the desire to use paint on a page. However, I often am stumped by it's look when I am finished. It never quite has the effect I am going for. In this case, I liked the look of the circles, but did not like the flat, matte finish.I hand stitched the circles. I looked at adding trims. I tried several other things, but finally decided upon using glossy accents over the paint. I embedded buttons in the circle as well, using them tone on tone for a dimensional effect. The results reminded me of hard candy, which seemed perfect given that the LO centered around a lollipop.

For some added interest, I added some scraps of cheesecloth which I stapled to the page, then smeared with paint. I used some scrapworks alphadots and Echo park stickers for the title.

BTW, if you have an interesting international dish or food to share, there is a scrap challenge to submit it to over at Sketches for you during the month of September. Don't forget, the sketch-a-thon has started there as well. It's not too late to get into the fun. The submissions are not due until 9-30-10. So head on over there for a chance at some great prizes.

Monday, September 6, 2010

Cosmo Cricket Inspiration

  Recently, I felt very lucky to get my hands on some Cosmo Cricket kits. One I was lucky enough to win in an RAK. The other kits, I purchased for myself. I felt like it was about time to stop mooning over the kits and just get myself some. I am so glad that I did!

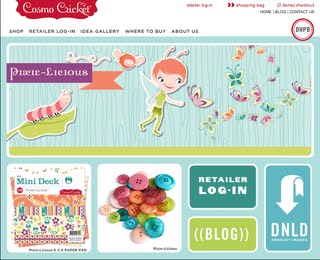
  Cosmo Cricket just posted an inspiration challenge to their blog. Using the cover of the home page, in this case, the pad of Pixie-licious paper, see what kind of project you could come up with.

I loved the block design of the pad's cover. So I went with that...but used the get Happy collection since I was scrapbooking about my son's favorite toy. To make the base CS a little more grungy to match the paper, I used some Black Magic Glimmer mist. I cut blocks out of the paper and then rounded the corners before placing them in a pattern similar to the cover's.


It's been a little while since I learned about the visual triangle. I recently signed up for a class at Masterful Scrapbooking design. In it, they talked about colors being used as part of that visual triangle. To be honest, I have done that before...but I was never aware of why I liked the effect. Armed with my new found awareness, I placed the blocks precisely to form the triangles. BTW, the only non-get happy pp is the arrow block. It's from the boyfriend collection. Somehow...I just felt that it went along with everything quite well. I used some stamps and colorbox Prussian Blue ink to make the title. I provided a little separation with some hand stitching. For visual interest, I added some staples and some hand stitching to the polka dot strips. The polka dot strips had some light blue lines...so I just followed those.

  Now...you might be wondering what the story is here. My Husband and son play quite a few video games. Starcraft had just come out. DS asked if there were any toys to spend his birthday money on. When we looked on-line, there was only this action figure on Ebay. He's a collector's edition from Blizzcon. He usually goes for over $70 in the auctions. So when my son asked to bid, I told him he could, but not to expect his birthday cash to be enough. When the bidding ended, we were all surprised that his $35 won him the toy. He is now my son's favorite thing.

   Well, what would this story be if I didn't scrap about the game. So on to page two... I scanned the covers of the box and then journaled some fast facts about the game in list form.


And while I am posting Cosmo cricket pages, I just had to share one more...

I used Early Bird to scrap about my son's birthday breakfast. This was a scraplift assignment from Sketches for you. I will admit...the polka dot paper is My Mind's Eye. I substituted it for the polka dot paper in the Cosmo kit b/c I really want the pattern on the other side of it for another page.


Thank you for looking. Don't forget to check out all of the great inspiration at Cosmo Cricket.

Friday, August 20, 2010

It Girl

Sometimes, it's hard to use pink when you have a boy. My only baby girl is my little cat, Sweetpea. So when I get the chance, I highlight her as a subject in the photo and go crazy with girly colors and bling!


For It girl, I chose to use a black pearlized card stock for the background and white pearlized cardstock for the mattes. DCWV's All dressed up collection was the perfect patterned paper. I layered it over ripped pink cardstock and inked everything with ruby satin colorbox ink. The left page is a sketch from Sketches for you. I painted some chipboard letters pink and used fruit punch stickles on the top. Painting your stash is a great way to make it work for you. Don't be afraid to be versatile. The word girl are colorbox punch outs which I used Glossy accents over. Glossy accents provide wonderful dimension and can easily update older stickers or die cuts. I used Making memories 5th avenue trim and sewed small pearl beads onto it.

The brads are K and company, Sassafrass and Basic grey(with stickles on them). The crown and Feather are basic grey rub ons to which I added stickles and perfect pearls. The journal spot is a Fancy pants rub on in just that perfect shade of pink. So while my son is in the picture, I can add lots of fun pink and girly accents by focusing on my cat.

Submitted to : Sketches for you
                       Scrapfit

Wednesday, August 18, 2010

jump for Joy: a recipe challenge

Recipe challenge can be...well, a challenge. That is the fun in them though...and they are a great way to use up you stash. Frosted currently has one underway. As I perused the ingredients list, I realized that the page I had just made using Scrapbook challenges sketch #212 fit the bill.


Lets see: bird(check),ribbon(check), felt flowers( that marks of two ingredients),buttons(check), and glitter(in the form of stickles). I believe that covers it! 6 ingredients! YES! There were 10 to choose from. perhaps you should head on over and see the list for yourself.

Meanwhile, I am a firm believer in combining challenges. So going through my challenge notebook, I realize I can also submit this page to:
                                             Big picture Scrapbooking for the "I Live" challenge today
                                             Scrapbook Challenges August color challenge
                                             Club Creating keepsakes Scrap your stacks challenge
                                             Sketches for you: Brenda's Fall colors challenge
                                             Challenge masters:go green inspiration challenge

being organized means being able to track and submit my work for a variety of challenges while still getting lots of pages done. I find I am creating more a lot more. So go get organized  and see just what you can come up with!

Using a circle template

  Club creating keepsakes has proven to be a great source of tips and information. I learned about one of my best and cheapest tools from a club ck peep. I always liked hand stitching, but had never tried it. I thought it would be to hard or take up too much time. When I learned about using plastic canvas as a template, all of that changed. As you can see from this photo of a recent layout, nice even circle are a breeze!

I used the template to align the brads as well as to stitch the circles. This Layout was completed for sketches for you.The paper is Creative imaginations. The green brads are Basic grey. The star brads are Making Memories Just chillin' line.


  I have 2 templates. One is a rectangle and one is a circle. I purchased them for under a dollar in the plastic canvas and sewing section of my local craft store. I can use them not only for stitching, but also for brads or anything else I want to put on my page in a nice even manner. You simply lay the canvas template down, and use a pencil to mark where your brad(or in this case, punched circle) will go.

As you can see, it is easy to keep a nice even line. Because you can see through the canvas,You can easily change the size of the circle you want...simple select a circle and then follow the squares around that circle as you mark with your pencil.

Paper used is Cosmo cricket Boyfriend collection. this is a Let's Scrap Sketch and part of the club ck one hour challenge: use hole  punched circles.
For stitching, I usually mark every other hole. I then go back with a paper piercer to pre-make the holes before I stitch.


It really makes stitching so easy!

  For flourishes or designs, I recommend the Bazzill In Stitches templates.They make adding a little stitched flair to your pages so easy.

The paper is fussy cut Basic Grey. I also hand cut the stars from the porcelain collection. I used Heide Swapp mirror hearts.

 I will say, I don't find the need to use the ones for words or letters. I simply hand draw, use a die cut letter or use a stencil as a guide for my letters...then I use the paper piercer to poke the holes and stitch.

If you do hand stitch on a page, practical scrappers is having a stitch challenge this week!
***Updated: the Jeep LO was featured as a Practical Scrappers top 3!

Saturday, August 7, 2010

My First Sketch!

I never thought I would be one to draw my own sketch. Yet, here was a challenge that required me to do just that! At first, I was really intimidated. Finally, I just decided to slide the photos around on the page and then work from there. This worked well for me as I began to see ideas form while sliding the photos around. I finally settled on a design and then sketched what I had made.

I used my cricut to cut the title with "a red bucket" font. The journal spot is K and Company. I tore a cs border, used an old fiskars border punch on another shade of green, then added some ek success fiber. I fussy cut some K and Co. scalloped pp from the recycle green grass matte stack. I then added a cloud 9 design baby boy stitched sparkle sticker. I fussy cut the green flower from the DCWV all dressed up stack and added a brad. The little green flowers were part of a ribbon strip I got in a rak. I cut them apart and added a green pearl to each. I stamped dots with green moss colorbox ink and a pencil eraser.

I am really happy with how this turned out and now I think I can draw a sketch almost any time I would like to. To try your hand at this challenge, pop on over to Sketches for you.