Showing posts with label frugal Friday tip. Show all posts
Friday, December 9, 2011
Scrap Our Stash Frugal Friday tip- buttons from packaging
We are all attracted to it in some way or another. Sometimes, it's part of what inspires us to make the purchase. Companies pay top dollar to design it. What am I talking about? Packaging, of course! Sometimes, I am loathe to throw it out. There has to be some way to use it. Today, I am going to invite you to get out some of your punches the next time you open a new scrappy supply.
Recently, I acquired a Martha Stewart embossing button punch. I have been searching high and low for things to punch( other than patterned papers) to make buttons with. I also happen to have a very messy drawer full of recycled items I hope to use in the near future. The problem with the messy drawer is that I hate to open it and look at the mess. Thus, I rarely use anything out of it. I merely pop it open as fast as I can to shove something else in. So I resolved to actually use some of that mess. I figured that if the item became an embellishment( as I had intended it too) than I might be more apt to reach for it the next time I was scrapping. Armed with my button punch, I opened the drawer and pulled out some package bits.
In November, I had acquired the Melody Ross chip art tool. I set aside the clear packaging portion to make ghost letters and homemade acrylic style shapes. The backing is a nice thick piece of chipboard. From it, I cut the bracket shapes outlined in yellow. These will be filed into my journal spots box. I can use them as is with the quotes intact or I can paint or cover the quotes to adapt them to some future page.
Now to punch some buttons from what's left. Parts of the packaging had lovely wooden patterns on it. That's where the buttons on the left came from. Other parts had flowers, birds and butterflies. Those would make some lovely buttons! However, the chipboard is too thick for my punch. So, I decided to peel away the chipboard layers. To loosen the layers, I took my paper piercer to a corner and separated the edges.
Once the corner is started, you can carefully peel away the layers. I did my best to peel it in half. This made thinner chipboard which my punch could handle and also allowed me to punch images from the front and back of the package.
Try to plan out where you want to punch. I cut away the unwanted parts of the back which had wording and the sku number. This made it easier to punch the parts of the image I wanted.
As you can see, these made some nice embellishments. If you don't have a button punch, try using one of your own favourite punches.
Friday, May 6, 2011
Frugal Friday Tip- Salvaging What You Can
I buy and use cheap luggage. I learned the hard way, that regardless of cost and claimed durability, luggage takes an extreme beating when you fly as frequently as we do.Often, given the beating it gets, expensive luggage has about the same life span as a cheap Walmart suitcase. To top it off, if the airline breaks it, they will either give you the cost of a cheap bag or cheap bag itself as a replacement. It's just not worth spending big money on luggage. Thanks to the airlines, a duffel bag style suitcase I have broke recently( the wheels came off and it was beyond repair). I realized I could do a little recycling. Armed with a sturdy pair of scissors, I cut the bag apart.
Not pictured is the one wheel I saved.I think it would be cool to use it with paint or ink. I'll roll it all over a paper for a grungy effect. I cut out several zippers which I can pull apart to use as trim or make into flowers. There were some cool metal tags and zipper pulls with the word "embark" on them which I can use in the future for travel layouts. I also cut off part of the handle figuring that these can also be used as an interesting trim. If you don't have a broken suitcase, consider going through old clothes in search of items to salvage. I have a pair of jeans that are not worth patching. I plan to use some of the pockets, the zipper, the label and the material itself to make my own embellishments.
Lately, I have been coveting Maya Road's zipper trim. I have seen some neat flowers made from it and have wanted to make my own. Zipper trims just aren't readily available where I live and quite honestly, I'd like to avoid having to buy them since my scrappy budget is very limited. I considered buying regular zippers from the fabric store. I can get them for around $2 or less. It's a good option if you want a specific colour or don't have any salvageable items. However, I decided to use my salvaged zippers to experiment with before I bought any.
You will need thread( I recommend using a colour that matches the zipper) and felt. As shown above in the photo, I used only one side of the zipper. I simply separated it, cut it apart and saved the pull to use an embellishment on another project. I cut the felt into a small circle. It doesn't have to be a perfect circle and if there is any excess, you can trim it away when you are finished. I started by sewing one end of the zipper to the center of the felt circle.
Then I just slowly wound it around, stitching it in place as I went. It resulted in a small rose style flower. As mentioned before, I trimmed away any excess felt from the circle that showed at the edges.
I like having the felt as a base for the flower. I think it makes it easier to adhere it to your page later on. Maya Road also has some zipper flower tutorials on their blog. They will give you ideas on how you can change the look of your flower.
Happy Salvaging everyone!
Not pictured is the one wheel I saved.I think it would be cool to use it with paint or ink. I'll roll it all over a paper for a grungy effect. I cut out several zippers which I can pull apart to use as trim or make into flowers. There were some cool metal tags and zipper pulls with the word "embark" on them which I can use in the future for travel layouts. I also cut off part of the handle figuring that these can also be used as an interesting trim. If you don't have a broken suitcase, consider going through old clothes in search of items to salvage. I have a pair of jeans that are not worth patching. I plan to use some of the pockets, the zipper, the label and the material itself to make my own embellishments.
Lately, I have been coveting Maya Road's zipper trim. I have seen some neat flowers made from it and have wanted to make my own. Zipper trims just aren't readily available where I live and quite honestly, I'd like to avoid having to buy them since my scrappy budget is very limited. I considered buying regular zippers from the fabric store. I can get them for around $2 or less. It's a good option if you want a specific colour or don't have any salvageable items. However, I decided to use my salvaged zippers to experiment with before I bought any.
You will need thread( I recommend using a colour that matches the zipper) and felt. As shown above in the photo, I used only one side of the zipper. I simply separated it, cut it apart and saved the pull to use an embellishment on another project. I cut the felt into a small circle. It doesn't have to be a perfect circle and if there is any excess, you can trim it away when you are finished. I started by sewing one end of the zipper to the center of the felt circle.
Then I just slowly wound it around, stitching it in place as I went. It resulted in a small rose style flower. As mentioned before, I trimmed away any excess felt from the circle that showed at the edges.
I like having the felt as a base for the flower. I think it makes it easier to adhere it to your page later on. Maya Road also has some zipper flower tutorials on their blog. They will give you ideas on how you can change the look of your flower.
Happy Salvaging everyone!
Friday, March 25, 2011
Frugal Friday Tip: Tin Can Recycling
Last November, I got a Sizzix Texture Boutique. While I love what I can do with it, I really have not used it to its fullest potential. When I saw a recent tutorial about using soda cans and punches, I had the idea to dust off the texture Boutique and embossing folders to see what I could come up with. The results were quite wonderful!
Materials: Embossing machine and folders
soda cans, rinsed out
old scissors
a Bic Mark it or other permanent marker
optional: a child ( My son likes to use my embossing machine. So I cut the soda cans while he worked
the machine.My son thinks this is great fun. )
You will need to carefully cut a slit into the can. Then remove the top and bottom. You are left with a curled piece of aluminium. Then it's just a matter of placing this into an embossing folder and putting it through the machine. I would just advise caution since the can is a little sharp after you cut it.
We experimented with a variety of designs. Some look better than others. You can use some punches to create your own shapes or use the permanent marker to draw a design of your choice.Then use old scissors to cut it out. The marker also comes in handy to draw an inked look to the edges of your cut shape.
I found glue dots to be the best way to adhere the shapes to my page. It's also very easy to punch holes for brads with your paper piercing tool. You could also conceivably choose to hand stitch on your metal embellishment. I plan to dust off my alcohol inks to see how well they would look on my newly embossed designs.
All in all...a wonderful and inexpensive way to make your own page embellishments and recycle. If you have a Frugal Friday tip like this one, please share it at Scrap Our Stash.
Materials: Embossing machine and folders
soda cans, rinsed out
old scissors
a Bic Mark it or other permanent marker
optional: a child ( My son likes to use my embossing machine. So I cut the soda cans while he worked
the machine.My son thinks this is great fun. )
You will need to carefully cut a slit into the can. Then remove the top and bottom. You are left with a curled piece of aluminium. Then it's just a matter of placing this into an embossing folder and putting it through the machine. I would just advise caution since the can is a little sharp after you cut it.
We experimented with a variety of designs. Some look better than others. You can use some punches to create your own shapes or use the permanent marker to draw a design of your choice.Then use old scissors to cut it out. The marker also comes in handy to draw an inked look to the edges of your cut shape.
I found glue dots to be the best way to adhere the shapes to my page. It's also very easy to punch holes for brads with your paper piercing tool. You could also conceivably choose to hand stitch on your metal embellishment. I plan to dust off my alcohol inks to see how well they would look on my newly embossed designs.
| Sassy Lil Sketches 3-14-11 design Cream Acrylic paint MME paper Maya road Chipboard motif inked in Colorbox black ink Paper Trunk Carson, black alphas Black paint stamped with a round lid DMC floss |
All in all...a wonderful and inexpensive way to make your own page embellishments and recycle. If you have a Frugal Friday tip like this one, please share it at Scrap Our Stash.
Friday, August 13, 2010
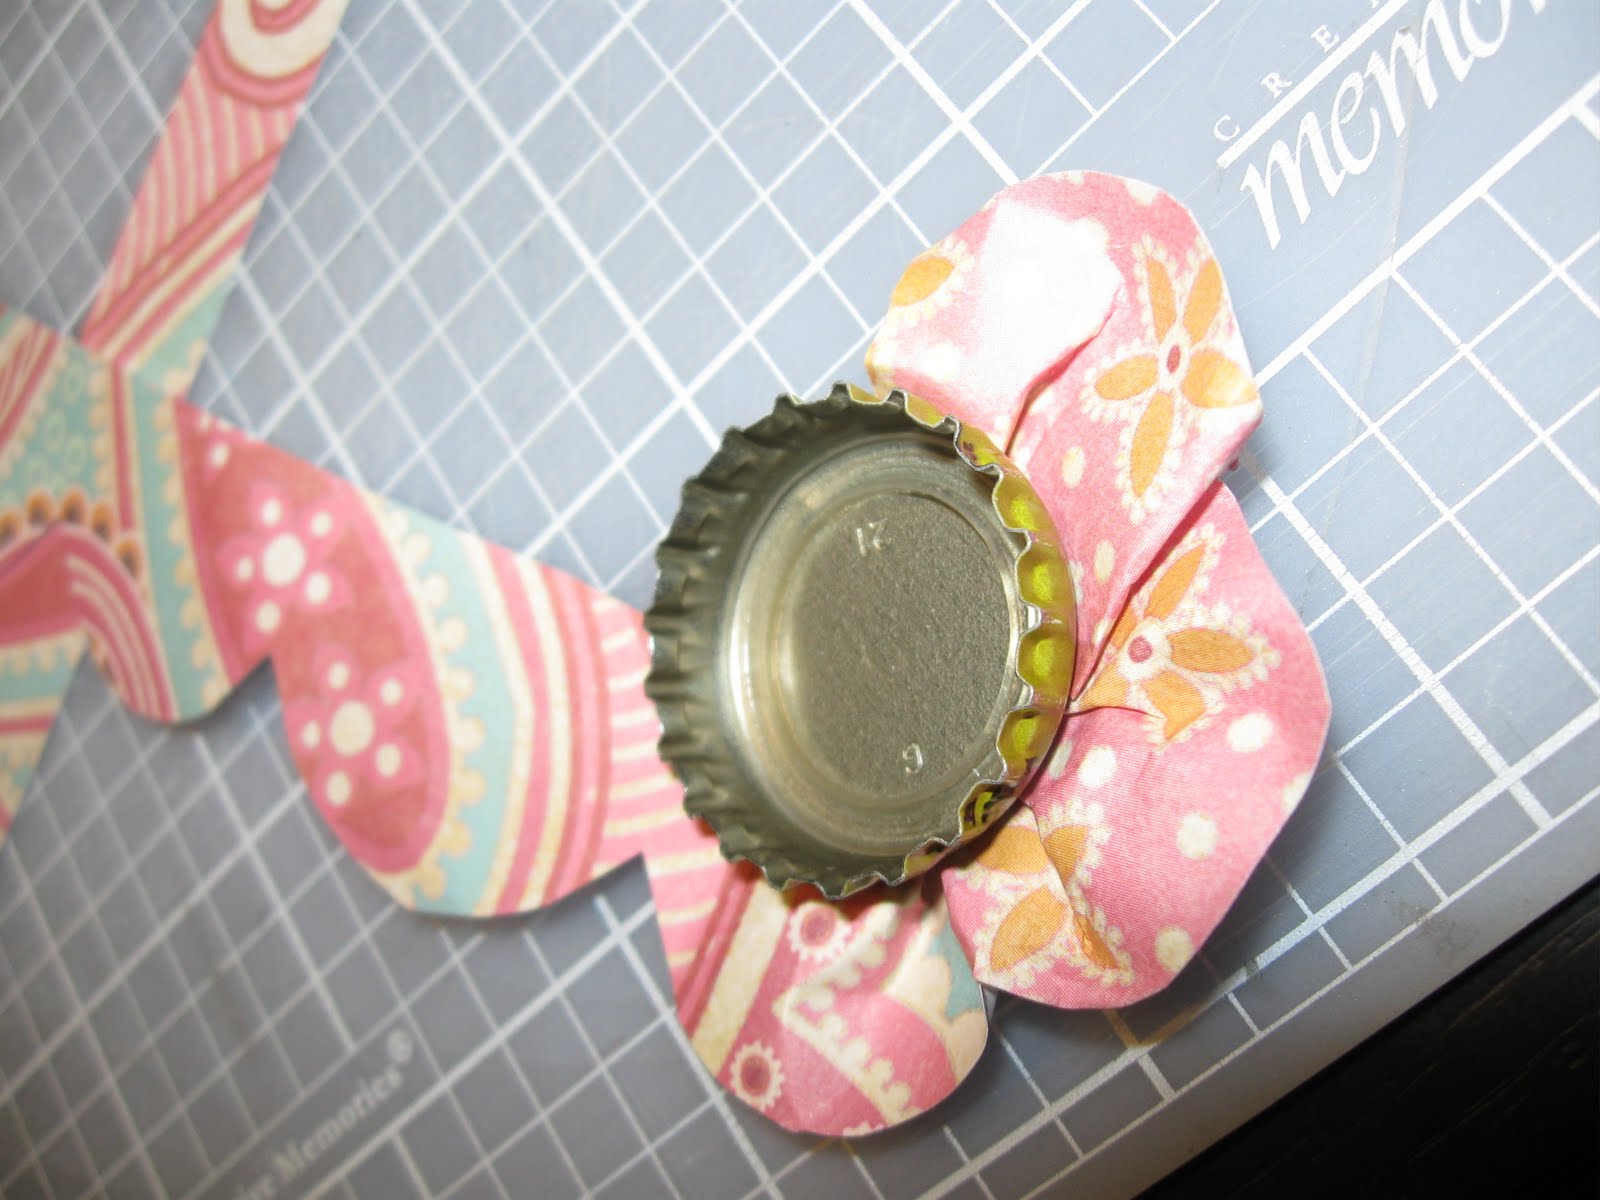
Frugal Friday- Bottle Cap Flowers.
A little while back, my son got a kit about using bottle caps to make craft projects. You can make a lot of neat things with bottle caps. In this "capsters" craft kit, they placed images, beads and anything you could think of. This got me to thinking of all the ways I could use bottle caps in scrapbooking. If you don't have bottle caps at home, that's ok. Craft stores sell them just for this purpose. You can also go into a restaurant and ask for them from their bar. they are usually willing to oblige. Just make sure you wash them and dry them well!
So here is what you will need: bottle caps, glossy accents(or a similar product), scraps of ribbon or paper, beads or anything else you wish to put inside your bottle cap, adhesive( I prefer glue dots for this project). If you want a scalloped daisy style flower...you will need a template (or if paper a punch) for scallops.Otherwise, strips of paper work fine. You can also use ribbon, crepe paper, felt, cloth,etc. *note, stiff paper may be difficult to work with. try this with a lighter weight paper first. I used K and Company paper for my example.
To get started, cut your scalloped strip of paper. Place a glue dot on the bottom of the cap and then begin folding/pleating the paper as you wind your way around the bottom of the cap. Apply adhesive as you go to keep your pleats in place.
Once you are finished, pour beads into the bottle cap or place whatever item you wish to go there. Then, fill the cap with the glossy accents. You will want to fill the cap to the top. This will help reduce any sharp edges the camp may have. You will need to let it dry fully before using it on your page or card.
If you wish, you can use a strip of paper or ribbon in place of the scalloped paper. The same principle applies...just keep adding glue and folding the paper or ribbon as desired. A second "ring" or set of petals can be applied under the first if you want more dimension.
This is a great way to recycle while using up scraps. You end up with a very unique flower.
So here is what you will need: bottle caps, glossy accents(or a similar product), scraps of ribbon or paper, beads or anything else you wish to put inside your bottle cap, adhesive( I prefer glue dots for this project). If you want a scalloped daisy style flower...you will need a template (or if paper a punch) for scallops.Otherwise, strips of paper work fine. You can also use ribbon, crepe paper, felt, cloth,etc. *note, stiff paper may be difficult to work with. try this with a lighter weight paper first. I used K and Company paper for my example.
To get started, cut your scalloped strip of paper. Place a glue dot on the bottom of the cap and then begin folding/pleating the paper as you wind your way around the bottom of the cap. Apply adhesive as you go to keep your pleats in place.
Once you are finished, pour beads into the bottle cap or place whatever item you wish to go there. Then, fill the cap with the glossy accents. You will want to fill the cap to the top. This will help reduce any sharp edges the camp may have. You will need to let it dry fully before using it on your page or card.
If you wish, you can use a strip of paper or ribbon in place of the scalloped paper. The same principle applies...just keep adding glue and folding the paper or ribbon as desired. A second "ring" or set of petals can be applied under the first if you want more dimension.
This is a great way to recycle while using up scraps. You end up with a very unique flower.
Friday, June 18, 2010
A Frugal Friday Tip
I submitted a tip to Scrap Our Stash Blogspot....and it just posted. To see how you can recycle to create some nice decorative storage tubs, pop on over:
http://scrapourstash.blogspot.com/2010/06/frugal-friday-tip_18.html
Subscribe to:
Posts (Atom)