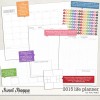
A few weeks back, I was purging my supplies and came across a Basic Grey Mini album. I chucked it into the donation box. It wasn't long before I pulled it back out again. Simple Scrapper released the 2015 StartFresh planner. I also saw Traci Reed's 2015 Life Planner. Both were available with the option to print out the pages. Both provided me with guides for completing specific scrapbook related projects. Now I had a planner with a goal in mind.
The Basic Grey mini album cover was pretty much a clean slate. Inside the album were a variety of pocket pages and page dividers. I realized that the album could fit the A5 planner pages with ease.
I must have tried making the album cover at least twenty times. In the end, simplicity won. I added a strip of washi tape, then chose a doily and some gold letters. I wanted to stitch the letters to the doily but I knew the heavy cover would not be friendly with my sewing machine. I stitched the letters to the doily first, then applied it with liquid adhesive to the cover.
Most of the inserts came with a printed design on them, which gave me a head start when it comes to decorating. There were only ten inserts. I used the provided inserts as a template and created a few more with patterned paper from my stash. I could have decorated every insert immediately. Instead, I have chosen to decorate each insert on a month to month basis. I realized I needed the insert to lay pretty flat. Bulky embellishments were out of the question. I stuck with washi tape, project life cards, and die cuts.
I chose a mix of pages from the Traci Reed 2015 Life Planner and the Start Fresh Workbook. Both provide additional project planning pages that I will print each month on an as needed basis. Most of the pages were printed on 8 1/2 x 11 paper and then folded to fit into the album. I like the option of seeing the whole calendar on one sheet. I have also decided to decorate the calendar pages with stamps, washi and stickers as I proceed through the month. My goal is to record anything I want to include in my monthly Project Life pages. I feel like I keep forgetting basic things such as games we played or books that we read. These pages will house my notes.
I have a Miscellaneous section in the back of the planner. It will house planning sheets for my long term project goals. I also have the empty page protectors. I plan to use the page protectors to hold ephemera I gather each month. Hopefully, if it's in the planner, I won't forget to add it to my Project Life spreads.
I don't always do Project Life Chronologically.I tend to jump around and complete whichever month suits my interest at the moment. The planner should help me with my long term projects as well as helping me to remember what happened each month. I love that I was able to use my stash to create it. Using it will help me determine if one of the pricier paper planners would work for me next year. Honestly though, as beautiful as those planners are, I think I will be pretty satisfied with my own version.
Supply Options
Additional Resources


Awesome idea!! Thank you SO much for sharing!! I actually have the exact same minialbum. That was a great idea!
ReplyDeleteI'm creating my planner as well and still trying to figure out how to combine it all... thanks for sharing your process!
ReplyDelete