Showing posts with label Glimmer mist. Show all posts

Thursday, May 3, 2012

Load 512 progress report

 So far so good. It always seems to start this way. I keep up just fine. This go around, I am really shocked that I have found a way to keep up with the daily prompts. I made it a point to have all of my page calls and assignments done for Scrapbook News and Review magazine.  Working on their staff has been awesome so far. it was a bit harrying at first, as is any job. Now I have a handle on the workload and am just enjoying being a part of the team. What did throw me a monkey wrench was life, as usual.On day one I was dealing with a sewage back up in the house. I haven't been feeling my best. The landlord asked me to show our house( it's for sale.) Little things here and there, but I have still manages to pull out pages.


Day one was to use a self portrait. I really dislike these type of prompts. Then I remembered I had a wedding photo of me prepping for the big day. So the issue of the self portrait became a non-issue. I used Paula Gilarde's ad inspiration challenge and was able to crank out a page with ease.
Cardstock: Bazzill; patterned paper: Basic grey
alphas and Stickers: basic grey, trim: Maya road
stamp: glitz designs with colorbox gold ink
mist: tattered angels, other: pearls, button, DMC floss, tulle

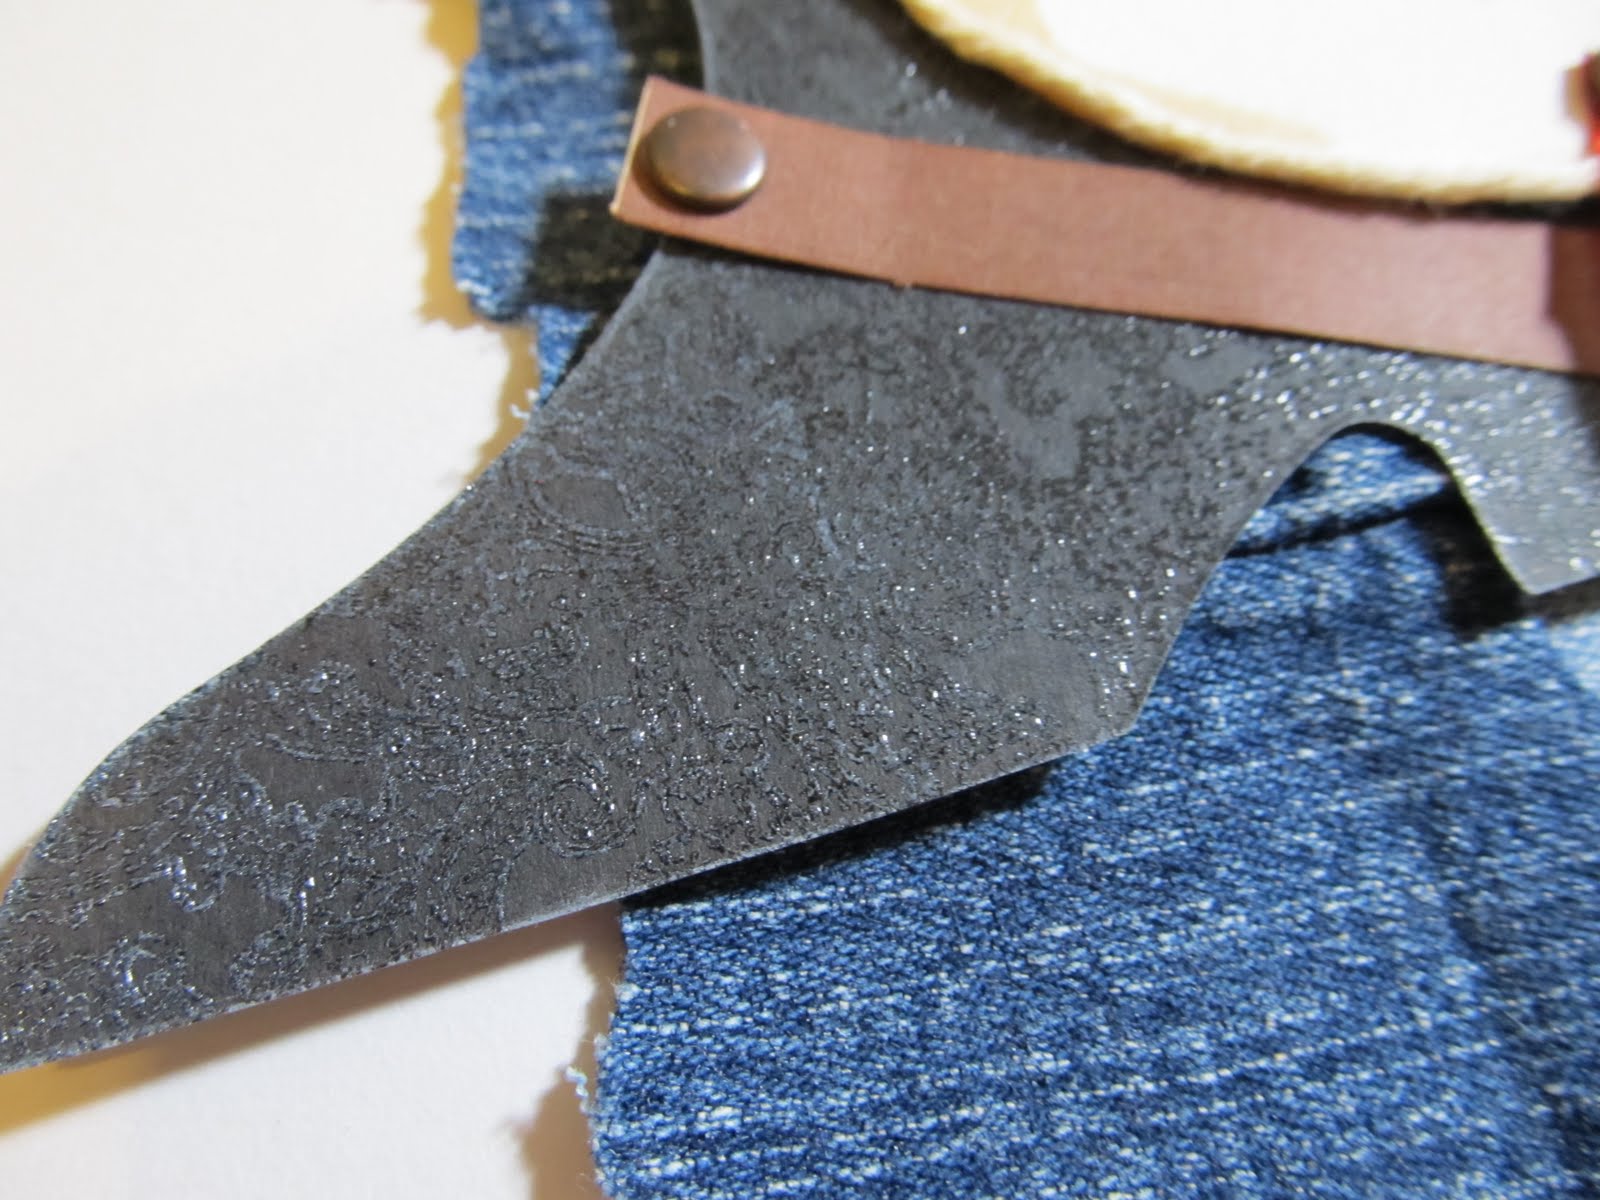
I am not 100% in love with the page. I liked everything until I got a little experimental. I painted the vine design with glimmer mist in the hopes of mimicking a design on the BG paper is was using. I then stamped the frames to use as journal spots. I have received many nice compliments about that portion of the page. I personally feel like it's kind of flat. It's funny how the parts you love are usually a miss but others rave about the parts of the page you think look horrid. LOL.

Day 2: I worked on my project life pages for February. I am no where near finished with those. I will share the full February pages in a later post. I know I am seriously behind with PL. Quite honestly though, it's not worrying me in the least.

day 3: My favorite page so far.  I have these HORRIBLY grainy photos of my new kitten meeting the family dog. Since these photos were a one of kind/ time deal, I am using them. I cleaned them up with photoshop the best I could. I used a stencil to make a custom background. Then I just layered some paint and embellies. The page came together fast. It's a fun page and I adore it!
Patterned paper: Die Cuts with a View
paint: claudine hellmuth; Die cuts: the Girls' paperie and
iloveitall- etsy; Buttons: October afternoon
Stickers: October Afternoon Other: acrylic paint, stencil,
and heart button
For whatever reason, the Beatles song was stuck in my head while I made this page. : You say "goodbye, I say hello..." It's time for me to go make dinner now. Check back with me later for the Mother's day blog hop and more LOAD pages.

Thursday, April 12, 2012

Spring Fling

 Spring is here.  Most notable for us this time of year, is the Easter holiday. Last year, we took our son to Atlantis' Easter fair. They had a lot of fun games along with the usual fair foods. What we enjoyed the most were the arts and crafts. My son had a blast making a candle, filling candy holders with treats and sand art. We did not do all of the crafts available. We picked and chose what seemed most interesting to a 10 year old boy. His favourite by far was making a wax hand.
glimmer mist- oriental poppy, Studio 18 jewels
Ribbon- Maya Road, Making memories
Alphas- Colorbok, Cardstock- Colorbok
Buttons- Basic Grey,Bazzill Basics
Sequins, homemade mask
I thought the Scrap Our Stash Pagerize this #20 challenge was the perfect jumping off point for making my page about our Spring Fling at the Easter Fair. Have you had a fling this Spring? Share it with us at Scrap Our Stash!

Thursday, April 5, 2012

Eggs-tavagant Easter blog hop

   Welcome to the Eggs-travagant Easter Blog hop. There are a dozen eggs in a carton and so we've chosen a dozen colours to share with you today. You should have started out at Jordan's Blog. If you arrived here first, pop on over there to start your colourful journey.
  Egg dyeing is a lot of fun. I could have shared a page about that. I have oodles of photos. However, I have been working on photos of last year's Easter fair and figured I would share some of those. My son made a ton of crafts. My favourite was the sand art bottle. While I loved the bottle itself, what I loved more were the expressions my son made as he created his sand art. He was so serious as he measured and poured the sand.
Sequins, glimmer mist- Oriental poppy
Ribbons- Maya road and Making memories
Studio 18 jewels, Paper trunk alphas

As you can see, my colour for the hop was Orange. the vibrant colour was perfect to highlight the precise pouring action in the photos. Don't be afraid to go monochromatic with your pages. It makes paper choice and embellishing easy as you can choose a wide array of items in various shades of the same colour.
  While butterflies might be a feminine embellishment( my son even asked why I had them on this page), I was able to slip them in here. I think of Spring when I see butterflies. Using them in the bright orange also made them less feminine. If you have a son, look for opportunities to use things like butterflies and flowers in symbolic terms on a page.
  Now it's time to head off to the next blog in the hop. I am dyeing( pun intended) to see what Lorri has for us! So head on over to Lorri's blog to take a peek!

Wednesday, April 4, 2012

Easter is almost here

  My son is counting down the days. He is pretty spoiled. Last year we took him to the Easter Fair at the resort my husband works at. We might go again this year, since we all had a blast. They had a ton of crafts, games and of course, the usual fair foods like slushies and cotton candy.

Floral paper- cosmo cricket, polka dot paper- sassafrass, grid paper- october afternoon. Ribbon- MM, paperclip-MM, journal spot-Jillibean soup, flowers- sassafrass, waterfall stickles, glimmer mist in electric blue and viva pink, boy epoxy button- pink paislee, sweet acrylix button- KI memories, 7 gypsies red mini paperclip, October afternoon stickers, Martha Stweart background stamp with clear embossing powder, Webster's pages alphas with glossy accents, DMC floss
Inspired by Peppermint Granberg's "First Day"
I guess I need to get into the spirit of things. Easter sort of crept up on me this year. I don't even have our decorations up yet. I guess I better do that today. Whether you celebrate Easter or Passover, I wish you a wonderful holiday!

Tuesday, March 13, 2012

Princess of Purr

   She is very happy here. The evidence is the frequent, almost non-stop purring. Sometimes I swear she purrs for hours on end, just happy to play and share some time cuddling. So, I decided to dub her the Princess of Purr.
Inspiration Challenge #41 from Paula Gilarde
Artsylicious Chipboard Alphas
Maya road stick pins
Prima Stamp in Colorbox Ruby Satin ink
Basic Grey Rub ons, black magic glimmer mist
Making memories button
Crochet flower- found in a thrift store, antique button
leftover packaging- photo matte, chipboard border
   At first glance, one might not notice that there is absolutely no pattern paper on this page. I used the package backing from an embossing folder for the matte. I covered the text using some ribbon scraps and the crochet flower. The chipboard alphas were chosen, in part because they cover the price tag. I noticed the alphas had this awesome border on the bottom, so I cut it off and used it here on the page. A very thrifty page that does not look thrifty at all!

Calvinball update:
1st time player- 1 point
late to the party- 1 point
1st time sub- 1point
layouts-3 points
spreading the word-1 point
daily blogging- 1point

total: 8 points

Saturday, March 10, 2012

What's Your Trend?

 I recently realized that I have certain techniques that have become trends. I am not necessarily talking about industry trends. I am talking about the trends you may see in the way that you work. I have tried a lot of new things over the past year. Some of those things have become staples in the making of my scrapbook pages. Misting and paint are one of those. I hardly make a page on which one or both are not present. So much so, that many of my friends now identify a page as truly me when they see the mist and paint. Last year, I really felt the need to hand stitch on quite a lot of the pages I produced. I now find that I am not hand stitching quite so much these days. My latest love is to use pen to outline the letters on my titles. I saw it done during a Masterful Scrapbook Design Seminar. Now I hardly feel a page is complete without it.
Let's Scrap sketch 1-4-12 ribbon-jillibean soup, glimmer mist-fairway,sapphire and tiger lily,SEI ink blue ink, Fancy pants to the moon papers,Amer. Crafts thickers-orange alphas,My little Shoebox tiny type alphas, Sassafrass green alphas, K and co. star chipboard sticker. superhero bands- from our egg dying kit, tags made with toilet paper which was embossed, inked and cut to fit the tag.
Who knows which techniques will become a regular part of your design style or which ones may become your scrapbook trends. The important thing is to observe your process. As you do so, you will learn more about who you are and the things that work for you. This will be a big help in developing your confidence and in making your scrapbook budget go farther. You will know which supplies to buy, because you will know the supplies you use most. So now, take a look at your work and ask yourself what your scrapbook trends are.

Sunday, February 19, 2012

Not Quite Straight and Even

 I have always had a problem with lining things up correctly. I can sort of eyeball something and cut it fairly close to the dimensions I need. However, despite rulers and various scrapbook tools, I somehow always end up with pages that are somewhat skewed. I guess I could let it bother me, but the frustration of constantly taking pages apart( over and over again) just to find that I have put them back together, yet again, slightly off kilter has led me to believe I will never be a straight, on the grid kind of scrapbooker. It's ok. I guess it's just a part of my style that is inherently me. Besides, if I never told you I meant for this page to be nice and even, set  in the center would you have ever known? it looks like it was meant to be this way.
All products are OA with the exception of DMC floss,
glimmer mist in spring rain and perfect pearls mist in Biscotti
Someone told me it adds to the character of the page. Maybe it's a happy mistake. Maybe my sub-conscious did this on purpose. Who knows?!?! Either way, I chose to accept how I made this page and I really do love it just the way it it!

Monday, February 13, 2012

Bringing Ju Ju Bee Home

     Recently, we were very lucky to open our home to a new kitten. When we first met her, she was full of energy and bold enough to jump right to the front of the kennel to play. We figured that she would be the perfect kitten for a home with an energetic little boy and a playful, older tabby cat. When I saw the Layout a Day prompt about home, I figured it would be a great opportunity to scrap about our new kitten's homecoming. It was not as smooth as we had expected. From carrier to car to house, she became quite frightened. She cried all the way home and remained quite timid  during almost the entire day. We were not sure where that brave kitten had gone.
Viva Pink and Electric Blue glimmer mist
Pink paislee paper and rub on house
OA alphas and brown rub ons
Sassafrass border
Maya road chipboard
Since I am participating in May Flaum's Curious Scrapbooker's field guide class and week one is all about misting, I used a chipboard house from a mini album as a mask( mini album pages make wonderful shaped masks). I carried through with the house theme by using the Pink Paislee house paper. I am no stranger to using mists, but I have still learned new things from May as I always do. I am sure you will see more fun, messy pages from me over the next few weeks as I follow along with this class. I am really excited to see what new techniques I can pick up.
   As for our kitten...she has settled in quite nicely. I don't think it took her too long to figure out that she has a good home. She is very playful and affectionate. Her name is Ju Ju Bee. How she got her name is another story. I am sure it's going to appear on a page I make somewhere in the near future.
 

Sunday, January 29, 2012

Battery Powered?

  I homeschool my son and one of our favourite subjects is science. I tend to hoard science kits like I hoard scrapbook supplies. So my son and I made a commitment to not bring any more home until we used some kits up. This kicked off some good fun in our home, though I must admit, some of those kits were duds. As in...duds, not working, it's a no go. This was one such kit. Maybe the citrus was too old to conduct a charge.( we live on an island and it's shipped in). Maybe we had the wrong kind of penny or paper clip. Who knows!?!? We never got the light to come on using oranges and lemons as batteries. We still  had a great time and managed to learn about electricity. I took a bunch of photos for me to scrap which meant I not only used up a science kit, I used up stash too. It was a win-win all around.
Sketch from Cathy Zielske
Jillibean soup papers, stickers
Webster's pages sparklers
Twinery Twine- cappucino
glossy accents
star punch
DMC floss
Glimmer mist- Electric blue
Maya Mist- Creme Metallic
Pink paislee alphas
  Can you tell what's new on my page? Probably not. No hard feelings about that. It's hard to tell unless you know. I got Adobe Photoshop elements 10. I must say that it has helped me out quite a bit in the "having better photos" category. I still need to learn to take better pictures, but at least the ones I have look a tad better. I also used a large photo on my page thanks to the Cathy Zielske Design your life class at Big picture Classes. It's not something I would normally do. There is one other new thing on my page...I finally got around to weaving.
  Initially, I had just stitched boxes on the right hand page to even out the design.After stitching the boxes, I thought it needed a bit more than just a plain box with mist droplets in it. I was, sadly, too lazy to stitch a whole pattern inside the box. If I had planned things out, I would have evenly aligned the holes to make the weaving easier. So the weaving is a bit uneven. No matter, it turned out to look pretty interesting. I added some punched stars with a bit of glossy accents and ended up with some nice texture on my page. Here is a close up:

I wove the threads at random through various strands of the thread. It created this lovely pattern through the block. Proof positive that trying something new can yield a wonderful result.

So now it's your turn. Try a new tool, a new technique...anything new will do. Then share it with us at Scrap Our Stash!

Saturday, January 21, 2012

A Slightly Sour Adventure

  Last Easter, we took my son to a carnival at a local resort. There were a lot of great games, arts, crafts...and the opportunity to fill the bottle of your choice with powdered candy. What child could resist that?!?! There were a variety of flavors to choose from. Some sweet. Other sour. We advised my son not to choose the sour. He is not much for sour candies. Inevitably, some sour candy was put in his bottle.
    I'd like to show you his reaction to the candy. I did photograph it. Not to tease, but, I must say that I loved his reaction! Alas, it's part of my chinese whispers page for Club CK which I can not yet reveal( stay tuned). So for now, I will just share page one with you. I made it for the new CSI challenge group and I used some of the materials from my January Counterfeit kits. At CSI, you get a folder or case file like this one:
                         
Then you use it as inspiration for your page.It's sort of like a recipe challenge. Anyway, it provided a great jump off point for my page. The colours reminded me of the powdered candy. My counterfeit kit had yellow and turquoise papers in it. I felt like I could add some mists and embellishments to warm those colours up and meet the challenge requirements for CSI.
Creative Scrappers Sketch#198
Papers by sassafrass, pink Paislee and October Afternoon
DMC floss, Iroc jewels,
Ruby Rock it button
Little yellow Bicycle- tiny alphas and purple glitter alpa
Amer. crafts thicker-forest
salvaged ribbon
fruit punch stickles, pink paislee die cuts
  The title was inspired by the idea to document an adventure. The full title reads " Sandy Candy: a slightly sour adventure for the tastebuds."  The idea of using advice in the journaling set the stage for the story I told about my son and the sour flavors.
  That sort of odd looking thing under the title...well, it's a mask of sort. I made it from the top of some packaging. It's the part that would hang from a hook. I cut it out a bit more. I am not sure it it counts at the architectural element.It sort of looked architectural to me in an artsy sort of way. Regardless, I sort of liked how quirky it looked. I used this moss coloured glimmer mist which looks more blue green to me than deep green. I know I only really needed two pieces of evidence...but I did manage to get some other items from the evidence list on my page. The circles were cut from a sort of purple sheer ribbon. I hand stitched the swirls and added flowers and gems( my version of stones).

   Once again, I have managed to add some of my nemesis colours to a layout. I don't much care for yellow. Pink and purple are hard to get onto boy pages. On this page though, they had a little meaning. This carnival was at a resort hotel. So the yellow and turquoise remind me of the warmth of that day. Those colours, along with the pink and purple, are also colours of the candy. So it all sort of fit together. Adding the black to the page gave it a little masculinity. Overall though, it was the theme of the page that drove me to choose the elements that went on it. Proof positive that a page with a boy can have girl colours and flowers without being feminine.

Friday, December 23, 2011

A White Christmas- My Version

 I live in a warm climate. So, technically speaking, there is not white Christmas here. We have palm trees, cooler sea breezes, and holiday lights. I have only seen snow a handful of times in my life. It's a beautiful thing, but something I am glad I don't have to deal with every year. So, where's the white Christmas? It's hidden in the photos and memories I have recently scrapped of a trip to Colorado. It's the magic of tiny snowmen, the falling snowflakes, and crunch of the snow under your feet.
   One of the most magical things I have ever done with my son is to build this little snowman.
Pencillines sketch #262
OA papers, recollections snowflake stickers, ATD title sticker, glass beads, glossy accents, Jolee's felt snowman, Crate paper sticker, Kaleidoscope slide with transparency by magic scraps,glimmer mist in silver sugar, viva pink and electric blue
He was the tiniest of snowmen. At 6 inches tall, he was largest snowman that my son and I had ever built. I think we shall always remember him. Building him was not just a first for my son, it was a first for me.
  The magic of falling snow may sometimes be lost on people who deal with it on a regular basis. For us, though, even the tiniest of flakes was the most amazing and wonderful thing.
Unknown papers, doodlebug snowflake brads(?),Inkadinkadoo stamp with colorbox lagoon ink,Martha Stewart snowflake punch,waterfall stickles, sequins, glass beads, i-roc jewels, unknown vellum flocked with white snowflakes,unknown quote,glimmer mist in frost,moonlight and electric blue
title block received in a swap
lifted from a page called "June Faves" by Lynette Pancho

To mimic the look of the snow, I added some bits of leftover punched bits. The bits were from a sparkly Bazzil cardstock. So when I sprinkled it over the glue, some turned up on the matte side while others were sparkly.It added a nice bit of texture.
   Of course, after admiring the beauty and wonder of the falling snowflakes, children will then wonder about catching them on their tongues. I guess nothing tastes as sweet as a falling snowflake.
 Unknown papers( one of which is a vellum with white flocked snowflakes), martha Stewart snowflake punch, i-rock jewels, unknown snowflake button, glass beads, glossy accents,Karen Foster alphas outlined with an oceanview blue bic mark it,inkadinkadoo stamp with colorbox lagoon ink. Based on an Lo by Dina Wakely called "oh Fun."
Though I may not have the option for a white Christmas, making these pages sure got me into the holiday spirit. I hope your family enjoys the holidays and has a wonderful New year ahead of them!

Monday, December 12, 2011

Cookies For Santa

No...we did not bake them this year. At least not yet. I just finally got around to scrapping about last year's cookies. LOL. Nothing like being a bit behind, right? Months ago, I scrapped the photos of my son baking said cookies. As I was flipping through last December's album, I thought now might be a good time to use the scraps up. I must say, that when I saw that the Sketchy Thursday sketch really helped this page come together quickly.
Sketchy Thursday 12-8-11 sketch
Little Yellow Bicycle canvas border
Basic grey papers
Sassafrass alphas with glossy accents and glass beads
glimmer mist in Candy apple red and meadow
October afternoon stickers
I-rock gems
K and Co. brad
coffee filter
Perhaps soon, I shall get to baking this years cookies. Those photos sure make me hungry for some!

Tuesday, December 6, 2011

Twelve Tags of Christmas- Day 4

 As much as I liked the tag from Day 3, I decided to skip it...at least for now. The interesting techniques for the day 4 tag were beckoning. As usual, I lacked many of the supplies Tim used for his tag. What I did have was an embossing folder with the snowman. So I pulled out a thin piece of chipboard...the kind you can get from the top of a scrapbook paper pad. It was just the right thickness to emboss while at the same time thin enough so that I could cut out parts of the center. After embossing the chipboard, I cut the snowman out and carefully extracted the snowflakes with an exacto knife.
Once the cutting was complete, I applied a thin coat of white acrylic paint.After the paint dried, I added the rock candy crackle glaze.
While I waited for the glaze to dry and crack to perfection, I made the background sheet. I used a plain sheet of kraft paper as my base. Since I do not have all of the inks Tim used, I chose to stamp my blue ink pad onto wax paper. I stamped a square about the same size as the base paper. I then added a little bit of my homemade white mist. The white mist consists of watered down acrylic paint with a bit of perfect pearls powder.
Swirling the cardstock around on the wax paper created a wonderful sort of mottled effect. I set it aside to allow it time to dry. Now it was time to move back to the snowman. Once again, I did not have the inks Tim used. This time, I substituted glimmer mist. I opend the bottle and dabbed the dropper onto various sections of the snowman. I was pleased at how the mist seeped into the cracks. I applied the heat tool as Tim suggested and saw the white of the base coat become more apparent while the cracks kept the colour I had infused them with. I later noticed some of the glaze falling off.I am not sure why. Maybe it was the materials I used. To combat this, I applied a thin coat of glossy accents over the whole snowman.

Tim Holtz Embossing folder, Gauze from a first aide kit.glossy accents,
Ranger rock candy crackle glaze, Martha Stewart snowflake punch
clear packaging, Basic Grey Flourish stamp,
Technique Tuesday snowflake stamps
Colorbox ink in white and Blue Lagoon
Glimmer mist in electric blue, frost and spring violet
I raided the first aid kit for some gauze which I cut down and tied into a scarf. Thin clear packaging was punched into snowflake shapes. I am very pleased with the results. Most of all though, I am pleased with the new technique I learned for creating a unique background.

The Silly Rabbit

Yes, I know it may seem odd to scrap an Easter page during December. However, the photo wwas really begging me to scrap it. I was keeping current pretty well up until a few months ago. Now I am woefully behind. Aren't we all though!?!? Anyway, here's a little something spring during the cold months of winter. We had taken my son to an Easter carnival earlier this year.  When I saw the rabbit walking around, I knew I wanted a photo of my son with him. My son obliged and the rabbit added a little silliness to the whole thing which equaled the perfect photo!
Sketchy Thursday 12-1-11 sketch- Cosmo cricket papers-floral and bunnies, polka dot paper-sassafrass, sassafrass flowers, cosmo cricket border sticker, Sassafrass chipboard, pink paislee button, DMC floss, MM ribbon, American crafts rub on letters, Webster's pages alph stickers with glossy accents, glimmer mist in Electric blue and viva pink
update: on 12-8-11, this page was chosen as a Sketchy Thursday Fave! I am so excited. This is the first time I have been picked!

Sunday, December 4, 2011

Becoming Mr. And Mrs.

    Every once in a while, it's good to follow the step by step instructions in the making of a layout. Why? It introduces you to a new technique without the stress and guesswork of what to do with the rest of the page. During November, I took a free class at Miss Arts Paper Crafting School. The class led me through a series of steps to add texture and dimension to my page. It was an enjoyable experience and led to the creation of a page that, while not my usual style, is truly wonderful.
   I did not have all of the materials suggested to complete the Layered Layouts class. Rather than purchase the supplies, I made a kit, attempting to match the supply list as much as I could from my stash. By doing so, the page became unique to me, despite the fact that I was following a series of step by step instructions.
Gesso
Pink Paislee glitter alphas
Glimmer mist in frost
Basic Grey paper clip
Tim Holtz metal tags
I-rock jewels
Basic Grey Wisteria paper
Making Memories shimmer flourishes-blue
My Mind's eye papers
Maya Road lace trim
Carboard
gauze from my first aide kit
Jenni Bowlin stick pins
Webster's Pages button sparkler
Maya Mist in Latte Metallic

 Though I may not use everything I learned in the making of this page, I will take parts of the process to incorporate into future pages.
  By completing the step by step instructions, I was able to learn the how and the why behind the page's design.I also learned that I love altering pre-made embellishments to meet my needs. I have always loved metal embellishments, for example, but never really liked the way they looked on many of my pages.They seemed to dominate aspects of the page. By altering them, I was able to give them a one-of-a-kind look and better able to blend them into my page's overall design.


The metal tags  have so much more character. I even think it's easier to read them now.
  This page will become the title page of my wedding album. Though it might not be my usual style, it's very special to me, both because of the amount of work I put into it and because of the end result.

Now it's your turn! Scrap Our Stash is celebrating it's birthday! Share a page or project you've made to help celebrate two wonderful years of using your stash in new ways!


Friday, October 28, 2011

First Gondola Ride


 I started off with just one page. I ended up with two! The page on the left is a  scraplift for the Pagerize this Challenge #15. Tamara's page was easy to work with and I was inspired enough to stretch over to a second page.


MME Stella and Rose papers, ribbon, chipboard button and sticker
Prima Jewels
MM chipboard alphas
Echo Park mini alphas
Paperframe designs acrylic snowflake
unknown twine
sei inke blue ink
Glimmer mist in elctric blue and black magic
DMC floss
On a trip we took this spring, my son rode on a ski gondola for the first time. I loved his facial expressions every time the lift took off from the station. Tamara's page allowed me to highlight this moment perfectly.
   Now it's your turn! Do you have a moment to highlight? Pagerize Tamara's LO and share it at Scrap Our Stash!

Tuesday, September 13, 2011

Reach for the Sky

Now you may think I had photos of us riding horses or spending time on a farm, but in reality, I have these photos of my husband playing with our cat. So how does that go with a western theme?He gets our cat to put his paws up in the air. It's very silly and a lot of fun to watch. It makes me think of a little kid playing cowboy and my cat is just sort of happily going along with it all.
 So now that I had decided to go with a western theme, I set about trying to carry it to the page. I decided I wanted to use a phrase like " get your paws up" or " reach for the sky". I imagined using western themed papers and embellishments. However, in going through my supplies, I really had very little in that genre. What I did finally find were some die cuts, well over 10 years in age( still not sure why I have those. I bought them when my son was about two.) and some more current My Mind's Eye die cuts in a boy theme which just happened to feature a saddle. With die cuts in hand, I set out to find the perfect paper to go with them. I asked myself what reminded me of the western theme. I came up with denim, bandannas ,hand-tooled leather...all with a somewhat weathered look.
  For the hand- tooled leather, I decided to stamp and heat emboss the old boot die cut. It's subtle, but I think it gives just enough texture and adds to the theme.

 It reminds me of the fancy boots and leather saddles I saw as a child.
   I used an off colour cowboy die cut as a mask. The colour just did not work well with the rest of the page, but as a mask, it was perfect. I think I have discovered a use for all those old, plain die cuts sitting un-loved in my stash.
Sketchy Thursday 9-8-11 sketch
scrap of old blue jeans
sapphire glimmer mist
My Mind's eye die cuts
unknown die cut boot from the dawn of scrapping
i-rock jewels- brown square metal
Making Memories snaps(antique)
unknown gingham ribbon
colorbox chestnut roan ink

Leftover scraps from old jeans made the perfect background since I never could find just the right paper. Twine outlining the circle and accents of gingham ribbon also added to the texture and theme. All in all, a page proving that having specifically themed papers is not a necessity to set the right tone for your page.

Sunday, August 21, 2011

Round and Round

 Have you ever had one of those scrapbook moments. You know...the one in which you are snapping photos and thinking " I am so using that new paper with these shots!" That definitely happened with the photos on this next page. My husband took us to a little amusement park. As we were riding the Ferris Wheel, I kept thinking about how I was going to use Echo park's summer days kit to scrapbook the pictures. After all, there was this perfect ferris wheel sticker right in the kit!
Sketch support #18
Scrapfit WWU #12-use scallops
Glimmer mist: meadow, electric blue and viva pink
Echo park papers, brad, chipboard and stickers
unknown die cut letters


With sketch 18 from sketch support, the right papers and a little glimmer mist...this page was done in a snap. Which is what I really need right now. Our moving day is imminent. Most of of things ( except for what we are using) are packed and ready. So...sorry to keep this short, but I want to pack in as much scrap time as possible before our move.

Sunday, August 14, 2011

Raising Polliwogs

Last summer, we had a unique experience. We found some tadpole eggs in a local pond and were lucky enough to watch them hatch. We have raised tadpoles before, but they had always been caught just after hatching. This time, we had found the eggs, conveniently sitting on a lilly pad close to the water's edge. I scooped them up in an empty water bottle and we set up a habitat for them in our kitchen. Little did I know, our kitchen was the perfect environment for the polliwogs. Shortly after they came home, my son noticed the eggs wiggling and jiggling. Almost every egg hatched totalling about 30 of the tiny creatures! Of the thirty, most of them survived and were released back into the pond from which they had come.
  Now here is is a year later, and I am just getting to scrap those photos. Technically, I picked out the papers in this kit for my counterfeit kit challenge carnival kit. Yet when I saw this green print paper from echo park, it reminded me so much of frog eggs that I decided to use it right away.
 Echo Park paper with white acrylic paint, Making Memories Chloe's closet leather frame cut into part, Webster' spages green satin pleated trim, K and CO. Transparency frame, DMC floss, KI Memories alpha stamps, Inkadinkadoo circles and dots stamps, Colorbox olive ink, Autumn leaves red ink
Submitted at Frosted Designs for the Fabulous Friday Animal challenge

I stuck with a sort of green theme, mixing and matching some of the textures that seemed to feel right for the page. Since I had many photos of this event, I used many of the same materials over the next few pages.

Sketch Inspiration #232, white acrylic paint, green water color crayon, Meadow green glimmer mist, echo park papers, colorbox ink: olive and chestnut roan, Autumn leaves ink:red, KI memories alpha stamps, inkadinkadoo circles and dots stamps, Fancy pants grid paper,Making Memories leather frame by Chloe's closet, webster's pages ruffles

My favourite part of both pages are the hand made alphas. I followed the tutorial at the counterfeit kit challenge to copy the design behind some Fancy pants alpha stickers. It's such a simple thing to do, however, it's one of those things that I never would have though of on my own. I love how they look and have a good feeling about using up my stash.
  Speaking of stash, the original intent of these kits for August were to scrap some very specific photos. I am glad I was inspired to get these frog photos done, however, I guess I really need to figure out where my honeymoon photos are. Off to look for those and hopefully scrap a bit more...

Baker, Baker

  When I started scrapbooking a little over a decade ago, I never imagined that I would be using anything other than traditional supplies. Yet here I am today, using things like coffee filters. What a wonderfully versatile and cheap supply! I do admit that I spray mine with archival mist before using them on a page. Since beginning to use coffee filters( just this past week), I have discovered a variety of tutorials and crafting ideas for using them. I anticipate using them often in the future!
 In the Mother Load class at Big Picture Classes, we have been discussing the reasons we choose specific items for a layout. Sometimes we choose things unconsciously or because they are an obvious means of conveying our story. In this page,I chose to use a single coffee filter. The filter itself reminds me of an oversize cupcake liner. The texture of the filter paper also reminds me a bit of a chef's paper hat or of being in the kitchen. So it was an easy fit in the page about my son and our holiday baking.

Sketchy Thursday 8-11-11 sketch
glimmer mist in Meadow and Candy Apple Red
coffee filter,cut in half
Little Yellow Bicycle canvas border
Basic grey paper and border sticker
Colorbox chestnut roan ink
Artsylicious brads and flower
Sassafrass alpha-Burlap with glossy accents

I chose the papers and embellishments for their colour and mood. The red and green symbolize traditional Christmas colours. While the papers patterns and gently aged appearance remind of cosy times in the kitchen with my Mom and Grandma. In my home, baking goes hand in hand with a mess. We try our best, but things always get splattered around a bit. So I felt the splashes of glimmer mist would be a subtle reminder of that.
  Though the reasons behind the items I chose may not be traditional ones or even obvious to everyone, the overall composition of the page delivers the tone I wanted to convey. I invite you to explore some non-traditional supplies in your scrapbooking. Like the coffee filters, they just might help you embellish your story in just the right way.