Showing posts with label alcohol ink. Show all posts

Wednesday, December 7, 2011

Twelve Tags- Day 5

  Mine is not really a tag at all. As i have for the other days, Day 5 is an improvisation using what I have on hand. Some of you know that I am a mystery box addict. One of the things I get in the Maya Road mystery boxes are acrylic shapes and mini albums. I am not one to make mini albums, but I do love to take them apart. I find I can use them directly on a 12x12 scrapbook page. So with that in mind, I chose some acrylic mini albums pages to play with.
ranger alcohol inks in expresso, latte and caramel
Th inking tool
Maya road Acrylic house
In addition to the house, I also chose a butterfly and a small paisley. As Tim suggested, you could also use product packaging.
  I started by covering the acrylic shape with the ink.

The house was my first attempt. I made the mistake of not letting it dry all of the way before I stamped on it. I did however, get the gist of what I was supposed to do and got a decent looking effect.I also did not have an archival ink. I used a dark brown pigment ink instead.

After the partial success of the first shape, I was keen to try more. My next attempt was a butterfly and a paisley. I also chose more appealing ink colours. I am now questioning the wisdom of purchasing brown inks. This time, I chose eggplant and stream colour inks.


As you can see from the closeup, the effect is subtle but stunning. The key to getting the image to come off is to one, let it dry well before stamping and two, blot gently with a dry tissue or paper towel.


I now have added more alcohol inks to my wish list. I am really glad I tried this out.I think it's going to add a lot to my pages, as far as texture and dimension. Keep your eyes peeled...this butterfly just might pop up on a layout soon.

Sunday, July 24, 2011

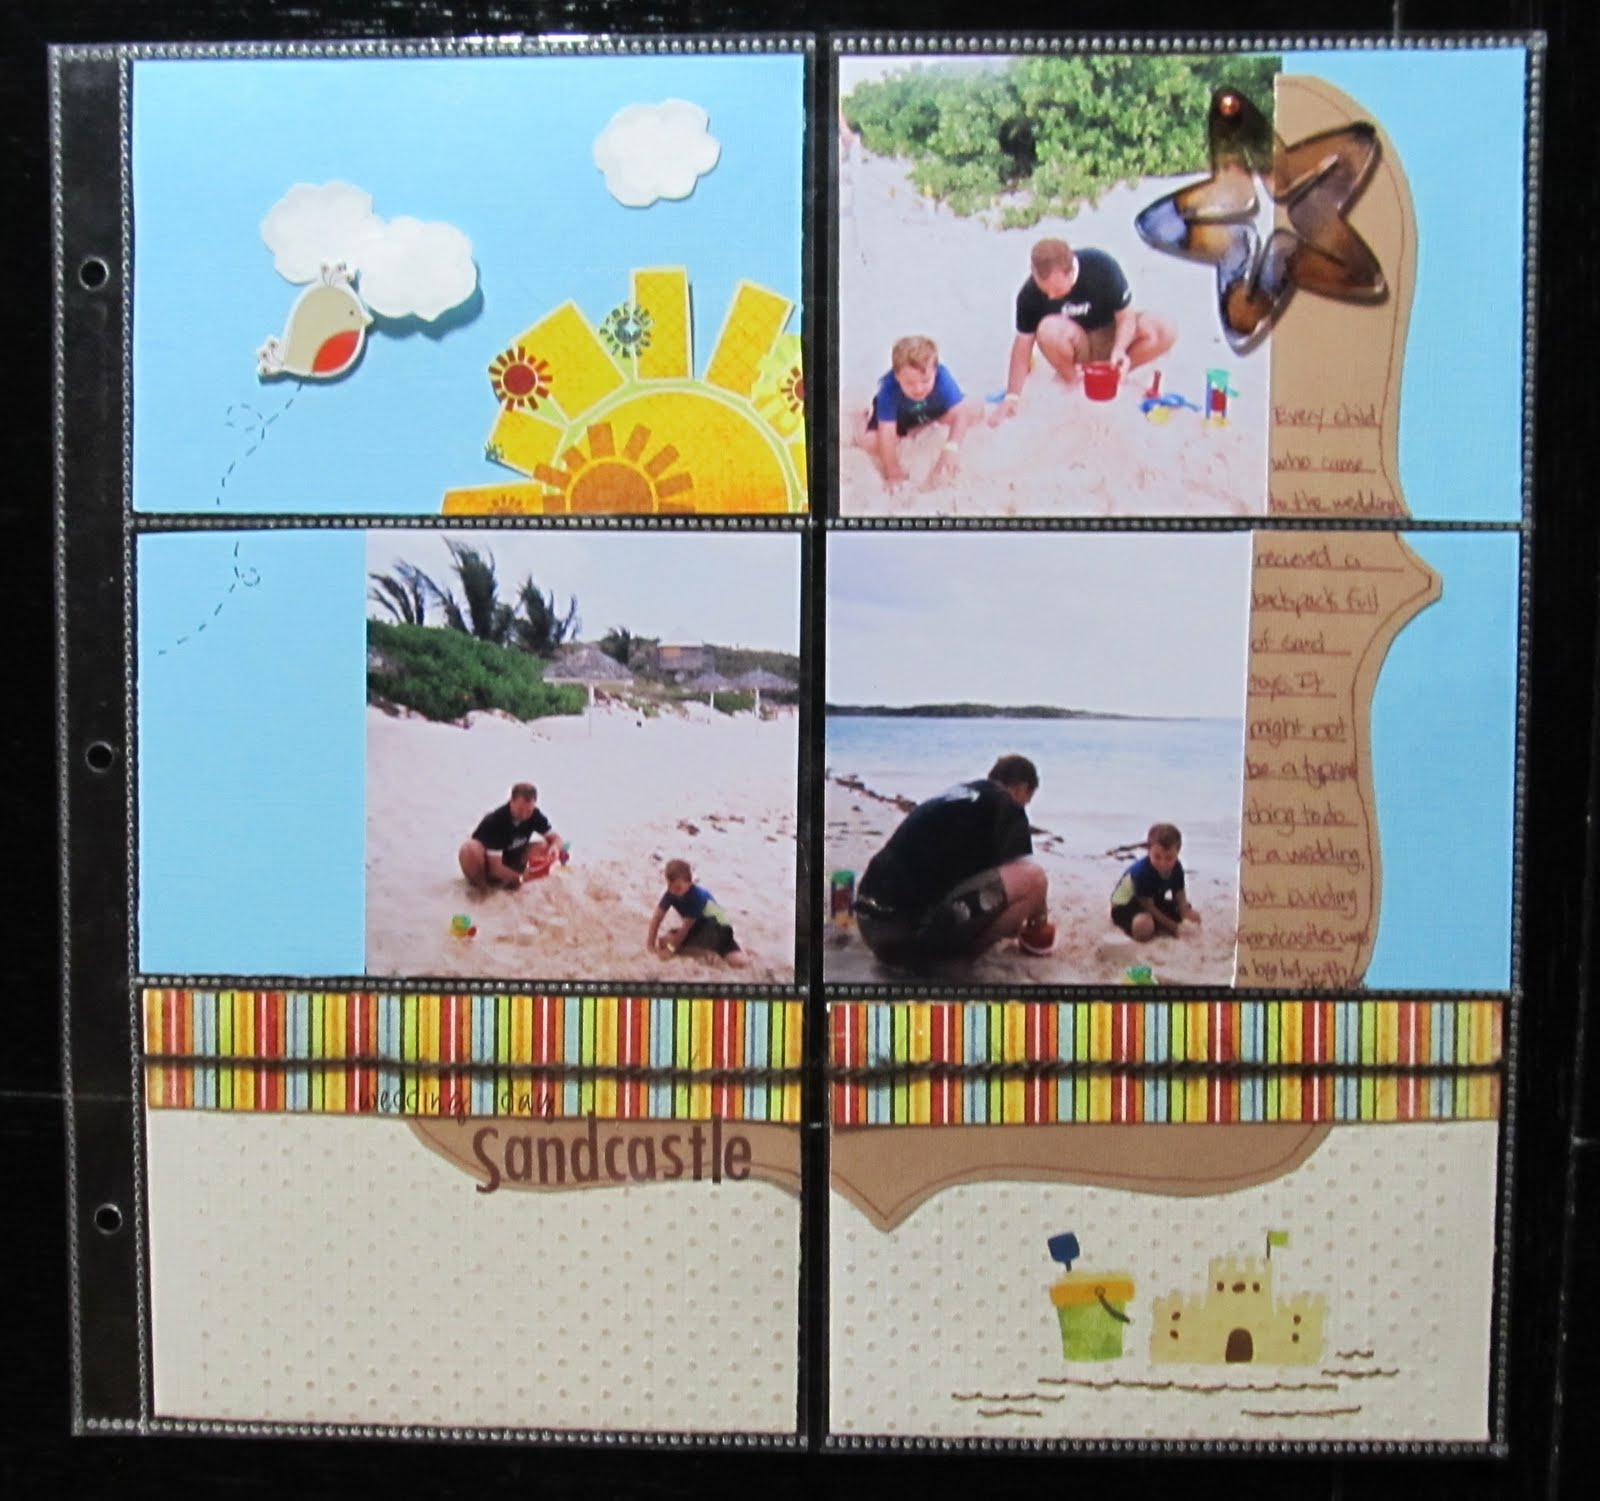
Wedding Day Sandcastle

    A few years ago, We were invited to attend a beach wedding. It was a lot of fun, though I will admit it felt very odd to attend a wedding dressed in a bathing suit and beach attire. My son thought it was awesome. He hates to dress up. The bride also made sure all of the kids who attended would receive a backpack of sand toys. The sand toys kept all of the kids( and my husband) occupied while we awaited for the wedding to start. It was a definite win-win scenario!
   I left my camera at home since the wedding was at a beach. I opted for some disposable waterproof cameras as I had no idea what we might encounter in regards to sand and water. When I began scrapping these pictures, I decided to try some of the 4x6 pocket sleeve style page protectors rather than the traditional 12x12. I had received a package of them for free with an album purchase.I figured this would be a great opportunity to use them since the photos were all standard 4x6 prints. I found there were a lot of pro's and cons to using these page protectors. You really need to plan where these will go in your album as the pockets are on both sides of the page protector. Using the photo sizes the pockets are intended for makes things a lot easier. I think If I had used one of the kits, like the simple stories line, which are designed for these types of page protectors, I would have had a much easier time. Once I got going though, it made for a quick and easy page.
Items from my July counterfeit kit:
Fancy Pants Paper and rub on's
Making Memories alphas
not from kit:
Jillibean soup twine
dmc floss
DCWV chipboard bird
Studio G stamp in white inke with clear embossing powder
Coredinations CS embossed with swiss dots folder and sanded
Colorbok CS
Maya Road Acrylic starfish coloured with eggplant and ginger alcohol inks

I did crop the 4x6 photos down. Not cropping them would have allowed me to just slip them in the pocket. I also chose a Pagemaps sketch, which meant it took a little more time and thought. For a faster page, I could have just decorated 4x6 cards and journal spots and slipped those in. On a positive note, I was able to use scraps for almost the entire page!

Shown above, are the backs of some of the 4x6 blocks. The white sections are the photos. You can also see how I covered page scraps that would otherwise have had gaps or sections missing with other pieces of paper layered over it.
 I could have left the tan paper and white clouds plain. However, embossing them gave just a tad more texture to the page. The sand coloured Coredinations cardstock was embossed with swiss dots using my texture boutique. I lightly sanded it to reveal the slightly darker core colour. I chose to use white ink in a cloud shaped stamp with clear embossing powder to add a subtle lining to the clouds. While these would have been just fine plain, this tone on tone embossing gives it a more finished look as does the hand stitching under the sand castle rub on.
 Now that I have the hang of working with these type page protectors, I will certainly consider using them more often. I think I will try some soon with one of the kits that are designed for these. Maybe then, I will find I like them even more than I do now.
 

Monday, July 19, 2010

Wired

I can hardly believe it. I am in round 3 of the MS. Scraptastic 2010 competition. It's been fun and challenging. If you want to check out some other entries, go here.So, for round 3, we had to complete a page about something we were passionate about or a hobby when we are not scrapping. I had the perfect topic and the funny thing is that I have had the photos waiting to be scrapped for a few months now.

Video games have been a huge part of our family. Dh and I grew up on them. When we first dated, we didn't have a lot of money to go out. So, we played video games together. While I miss those days, video games have come a long way. Dh and I now share that hobby with our DS. So, to scrap about it, I felt it needed the perfect elements.

I thought about using some of DH's spare parts. However, many are sharp in sections and I am not sure they are very acid free. So,I set out to make an embellishment based off a computer circuit board. I ended up pulling out one of DH's spare parts. I wanted to really do my best to capture the look of one. I chose to cut and ink a sheet of  clear scraps acrylic. I used green ink since many boards are green. I used a cotton ball to dab the ink on for better coverage.


Once the board was inked, I examined the elements on the board. There were several sku tags. To mimic the look, I cut the SKU bar codes from some PP. Next, I wanted to add the dimension of the black elements the circuit board had. I used some blackboard pieces. Brads became substitutes for screws, as well as some silver eyelets. I used some white opal liquid pearls to replicate the sodder points on the board. Gel pens in silver and gold completed the look. I am very pleased with the overall look of my board.


I had more photos than would fit onto the page. So I used scraps of the blackboard to build a pocket. I measured the tag the extra photos and journaling would go on, then cut two pieces: One in a blocky u shape for the pocket and one square shape to be the pocket cover. I added some Basic Grey origins paper b/c I felt the grid look matched the computer theme.

tip: if you have a lot of items for your pocket, layer the "u" shape until you gain enough height.

Each tag inside the pocket has journaling about some of the extra items we have acquired in our family hobby as well as some of the crazy things we do...like watch E3 on tv every year. E3 is a huge video game conference that tells about the newest releases. I tied a little metallic silver ribbon on the tags to show they can be pulled from the pockets.


 I  hand wrote the word "wired" for the title, then I used a paper piercer and dmc floss in silver/grey to stitch it. I used eyelets and satin cord to create the effect of wires across the page.

Initially, the photo placement was  a little off balance. So I used some grid paper to make wrap around journaling on the upper right page.                                                                                                              


Wednesday, July 14, 2010

Bloom

 It's been a long time since I have used my embossing powders.Years, in fact. So when Club CK had an embossing challenge for its summer camp, I pulled out my old heat gun. I ended up using a free paper piecing pattern from Club CK. I stamped the bird with colorbox blue lagoon and then heat embossed some blue powder over the top. Instead of using the branches that came with the pattern, I fussy cut some branches from a DCWV green stack paper. The nest is also from the green stack. I wanted the nest to "pop" so I tried another recommendation from Club CK. I used my crop-o-dile to emboss the dots on the paper. I don't have a cuttlebug yet, so this was a nice easy alternative.You can see a sample of the nest partially embossed here:

 A little tip...if it's a thick glossy paper, don't press too hard or you'll "crack" the finish. I decided to use a Maya road acrylic paisley which I had inked with Stream alcohol ink. I decorated with some diamond stickles, a staple in my supplies...and voila! A lovely bird in nest. I now have the Club Ck nature badge. I'll have to go back to earn the heat embossing badge...but it does help me use up some stash.
   The background paper is DCWV greenstack. I loved the rest of the stack, but until today had no idea what I would use this particular sheet for. The edges are inked in prussian colorbox ink, while the yellow CS is inked in apple green. The inked edges just help define things a little more...at least in my eyes. the title was cut with the AMORE att font on my cricut. This was completed using the sketchy Thursday 7-8 sketch challenge. http://sketchythursdays.blogspot.com/2010/07/78-sketch-challenge.html

For anyone completeing the club CK heat embossing challenge, don't forget to submit your Lo to Practical Scrappers. They are having an embossing challenge this week: http://www.practicalscrappers.com/2010/07/this-weeks-challenge-is-embossing.html


I honestly do not know what the name of the berry is in the photos. Guess I need to do some research...